Renting a GPU on SimplePod
Here you can learn how to set up a cloud-based GPU environment. Setting up a cloud GPU with SimplePod is quick and user-friendly. By following these steps, you can efficiently rent a GPU, monitor its performance and manage your billing.
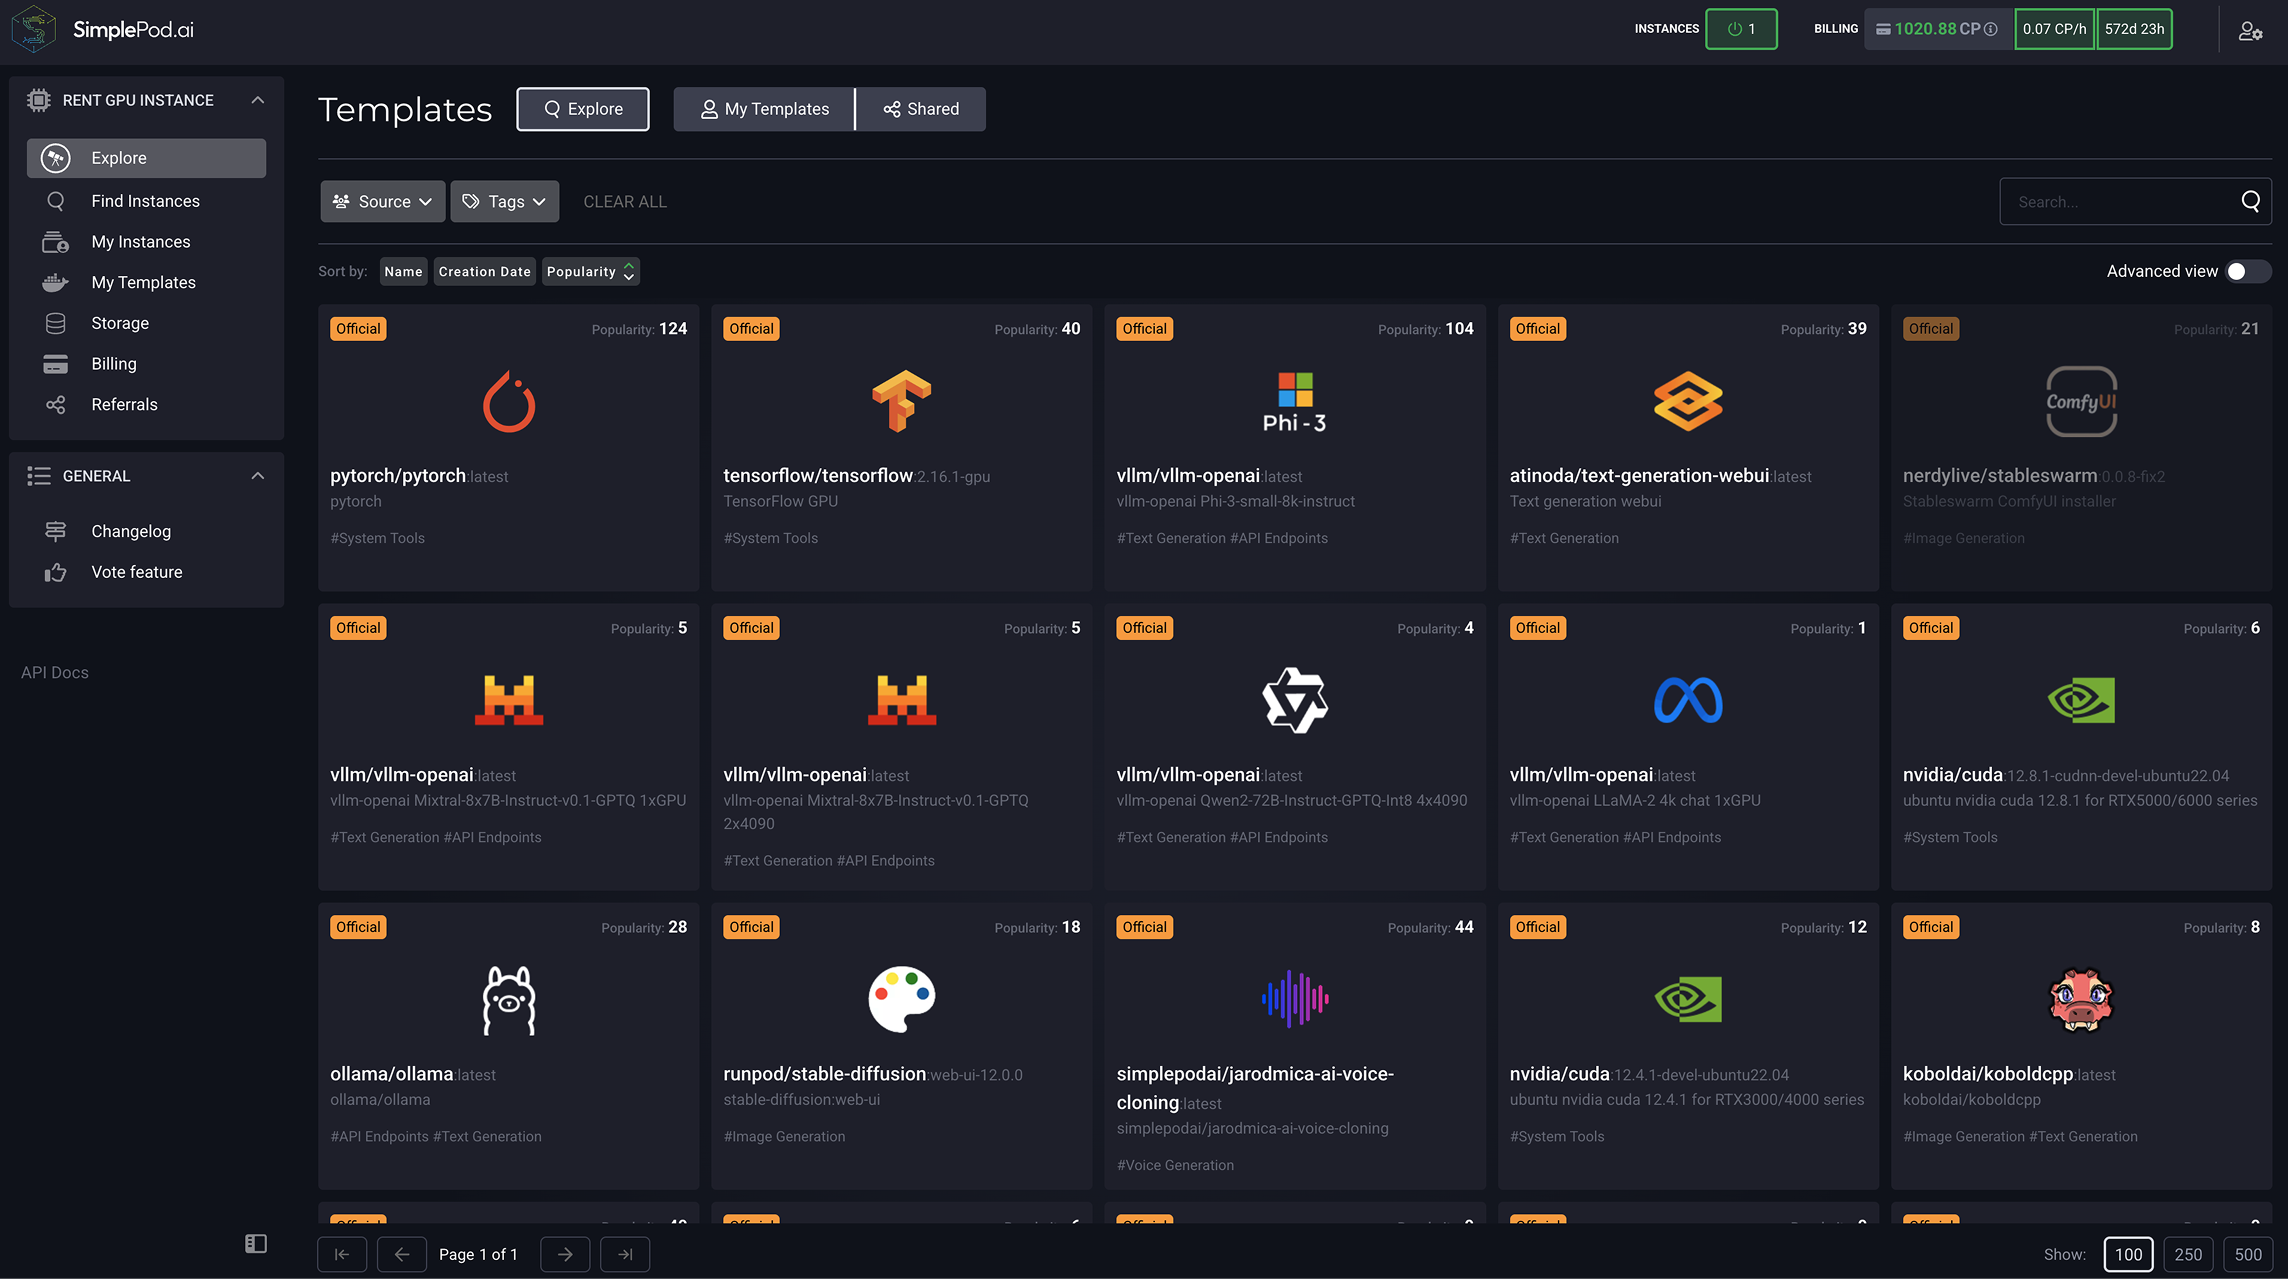
Step 1
Choose your Pre-Configured Software Option and cloud GPU:
Step 2
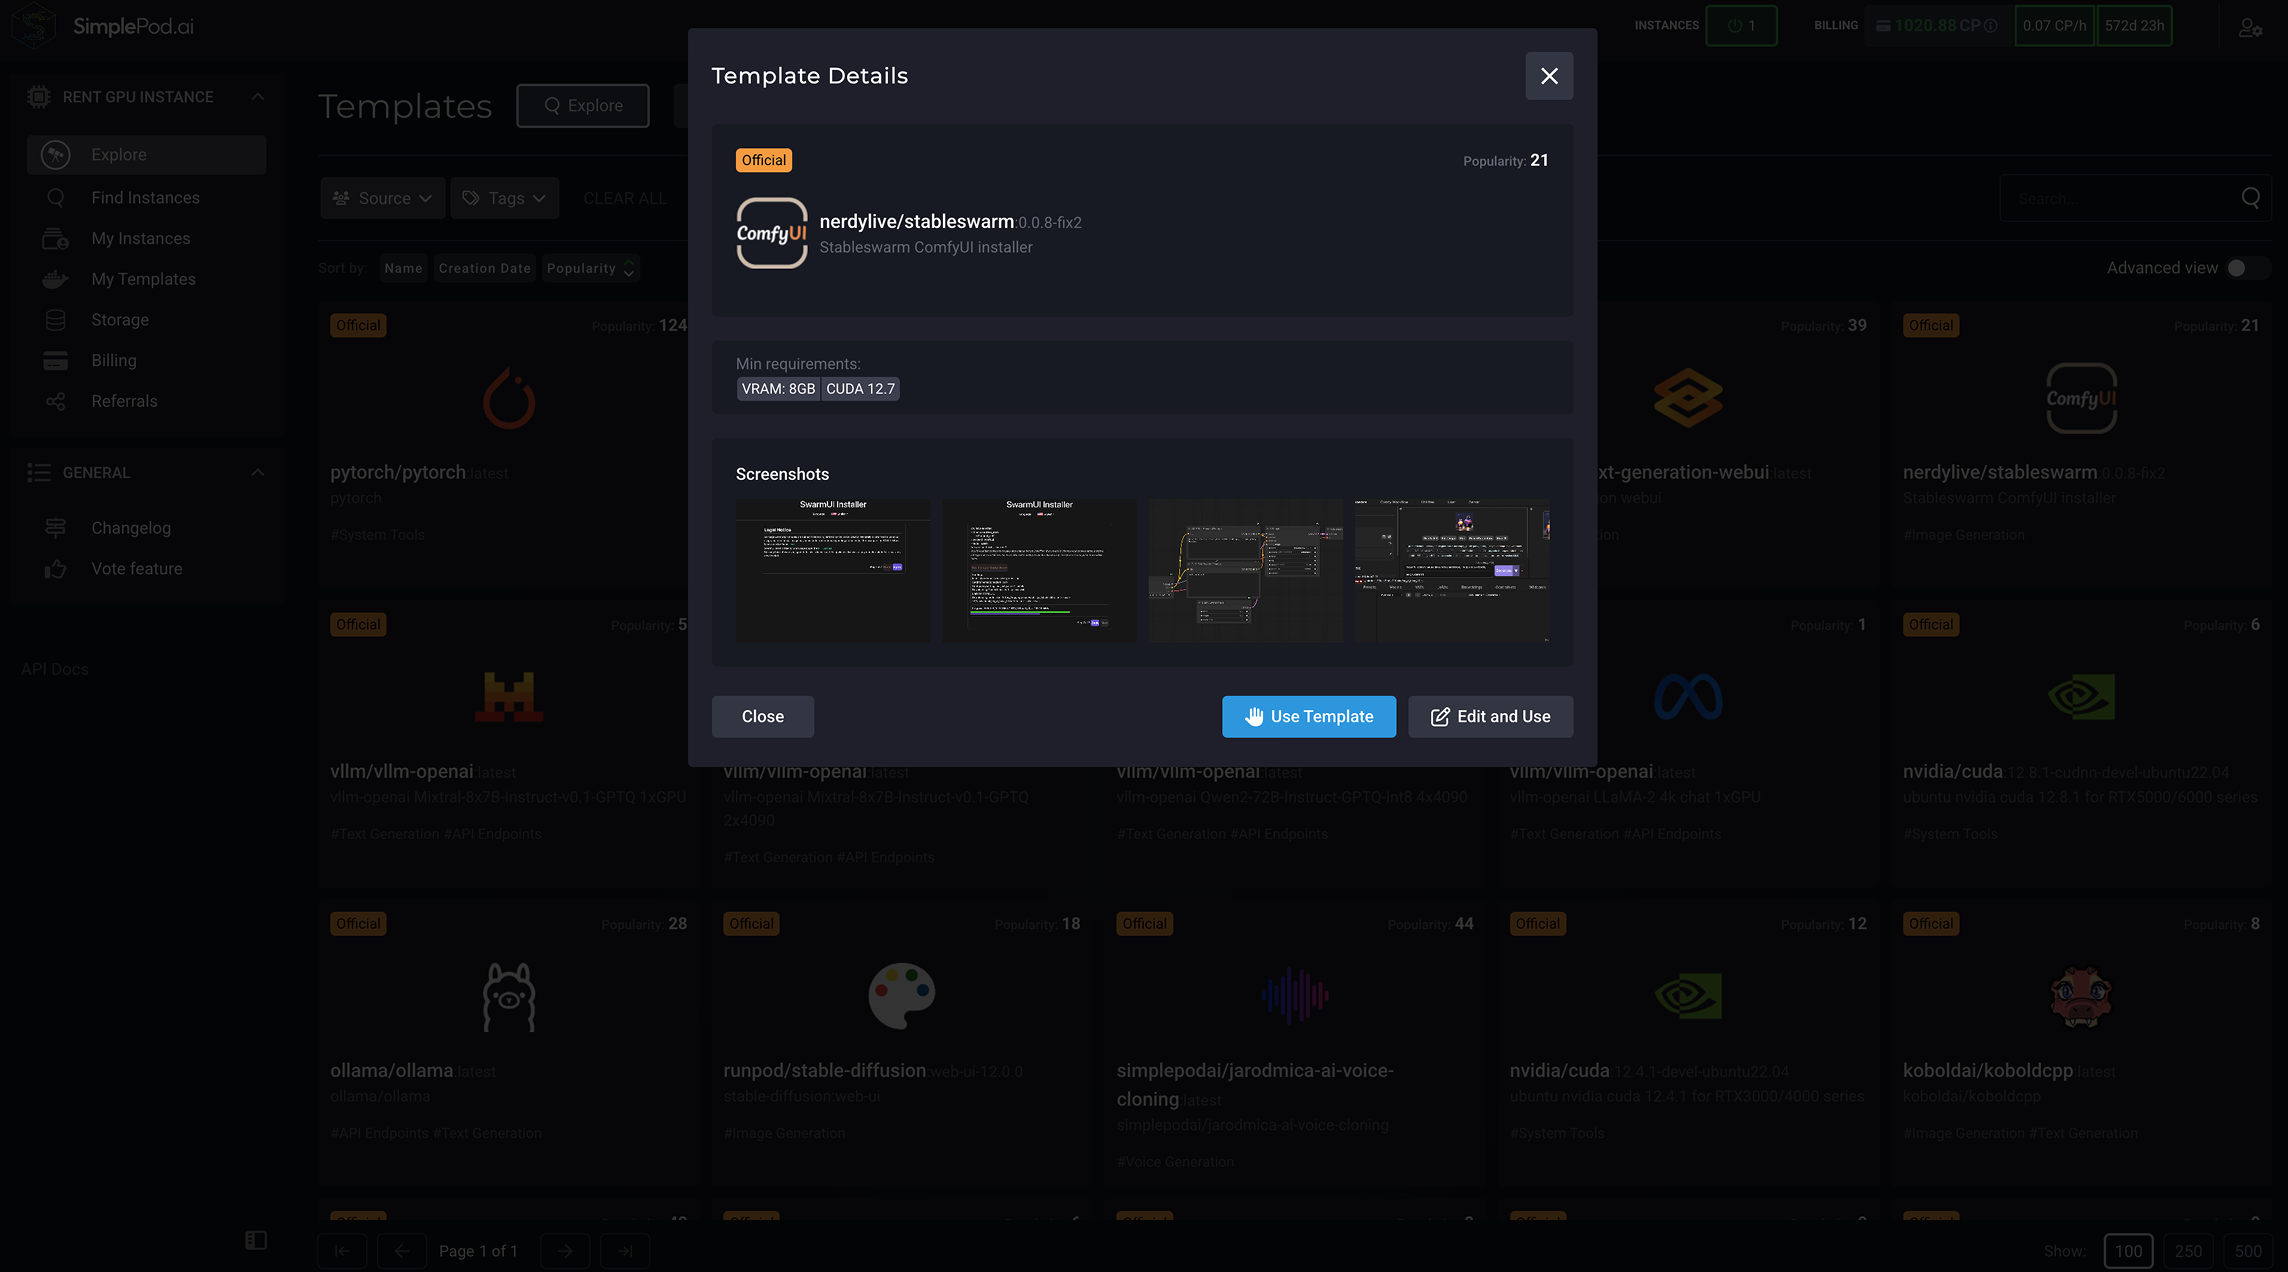
Automatic vs. Custom ComfyUI Workflow Configuration
Automatic Setup (View Template)
Apply default ComfyUI configuration instantly for a fast launch.
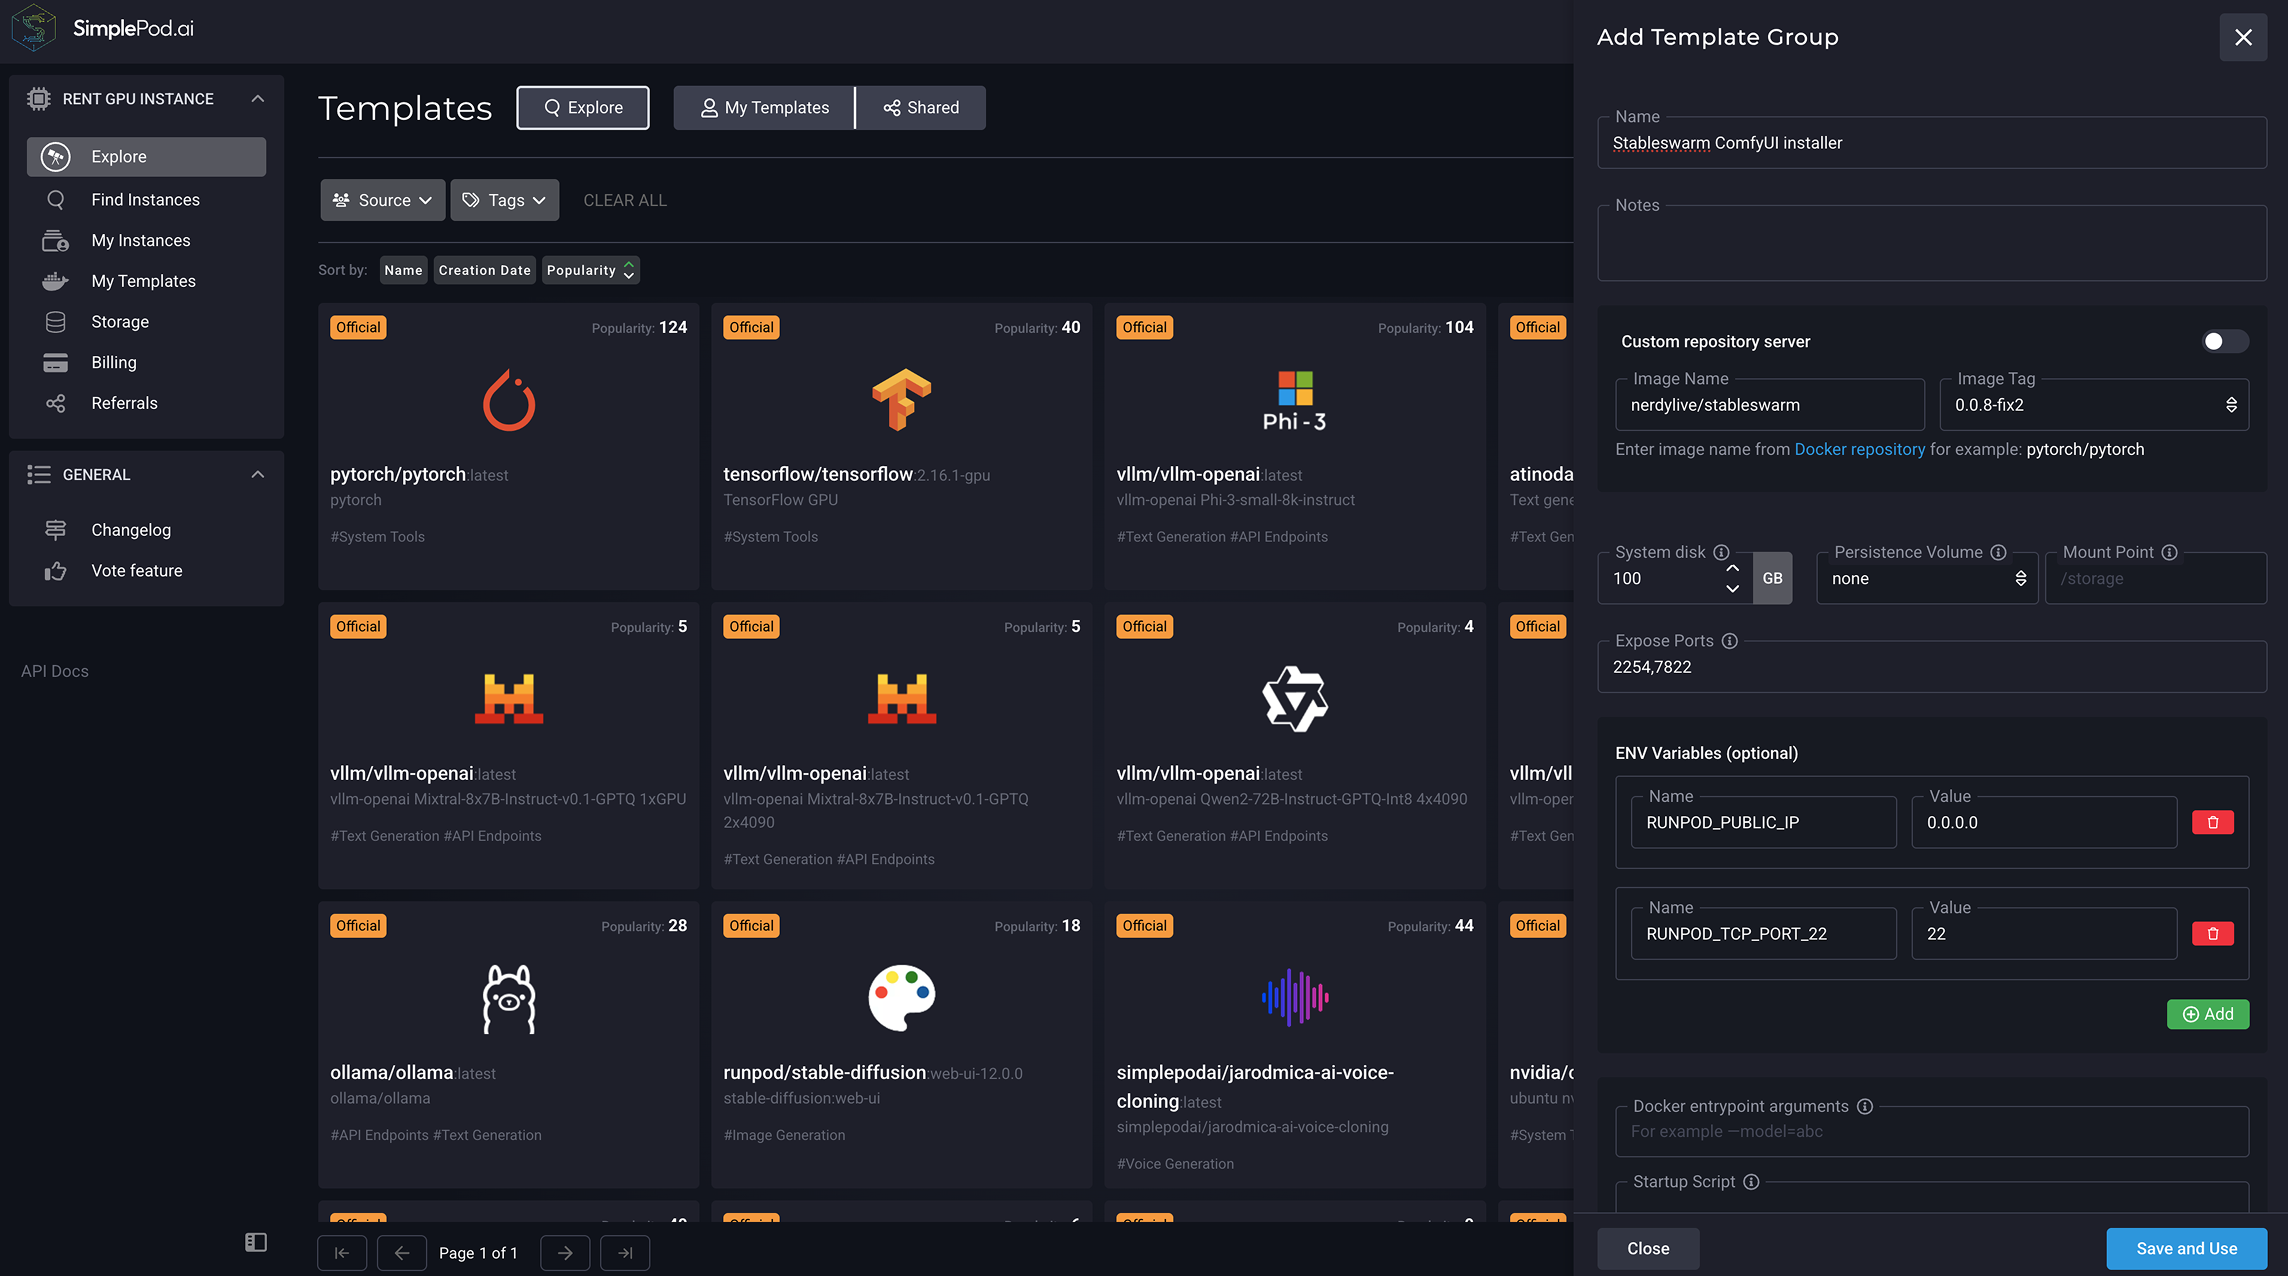
Custom Setup (Edit & Use)
Tailor node graphs, environment variables, and advanced tool options for a fully custom template configuration.
Step 3
Launch ComfyUI Cloud AI Instance & Provisioning
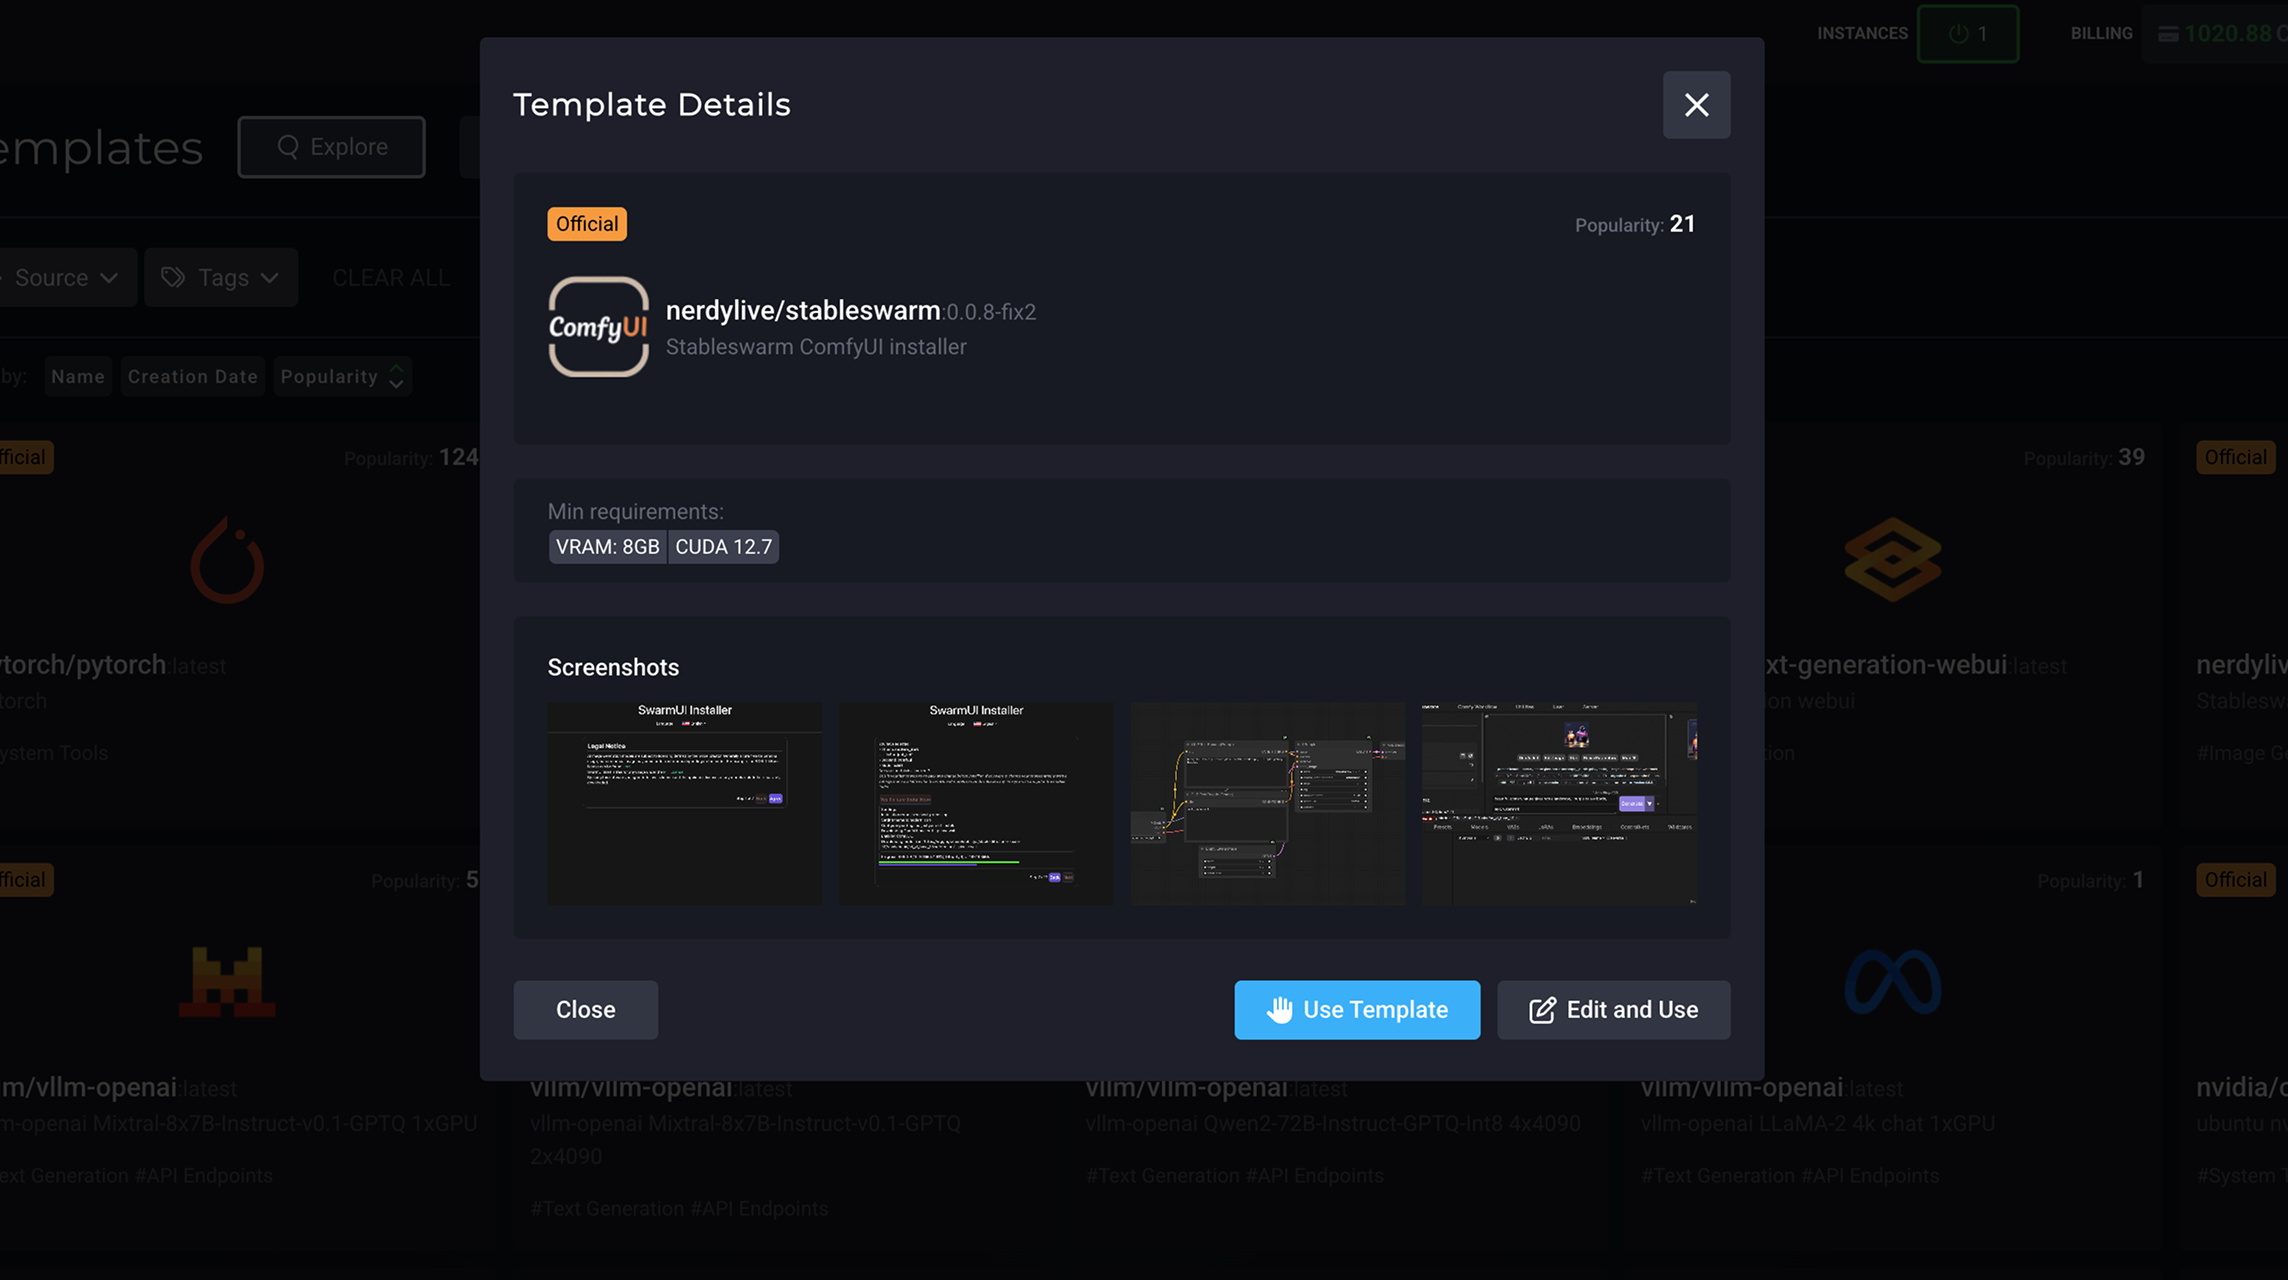
01.
Click Use Template on the ComfyUI card.
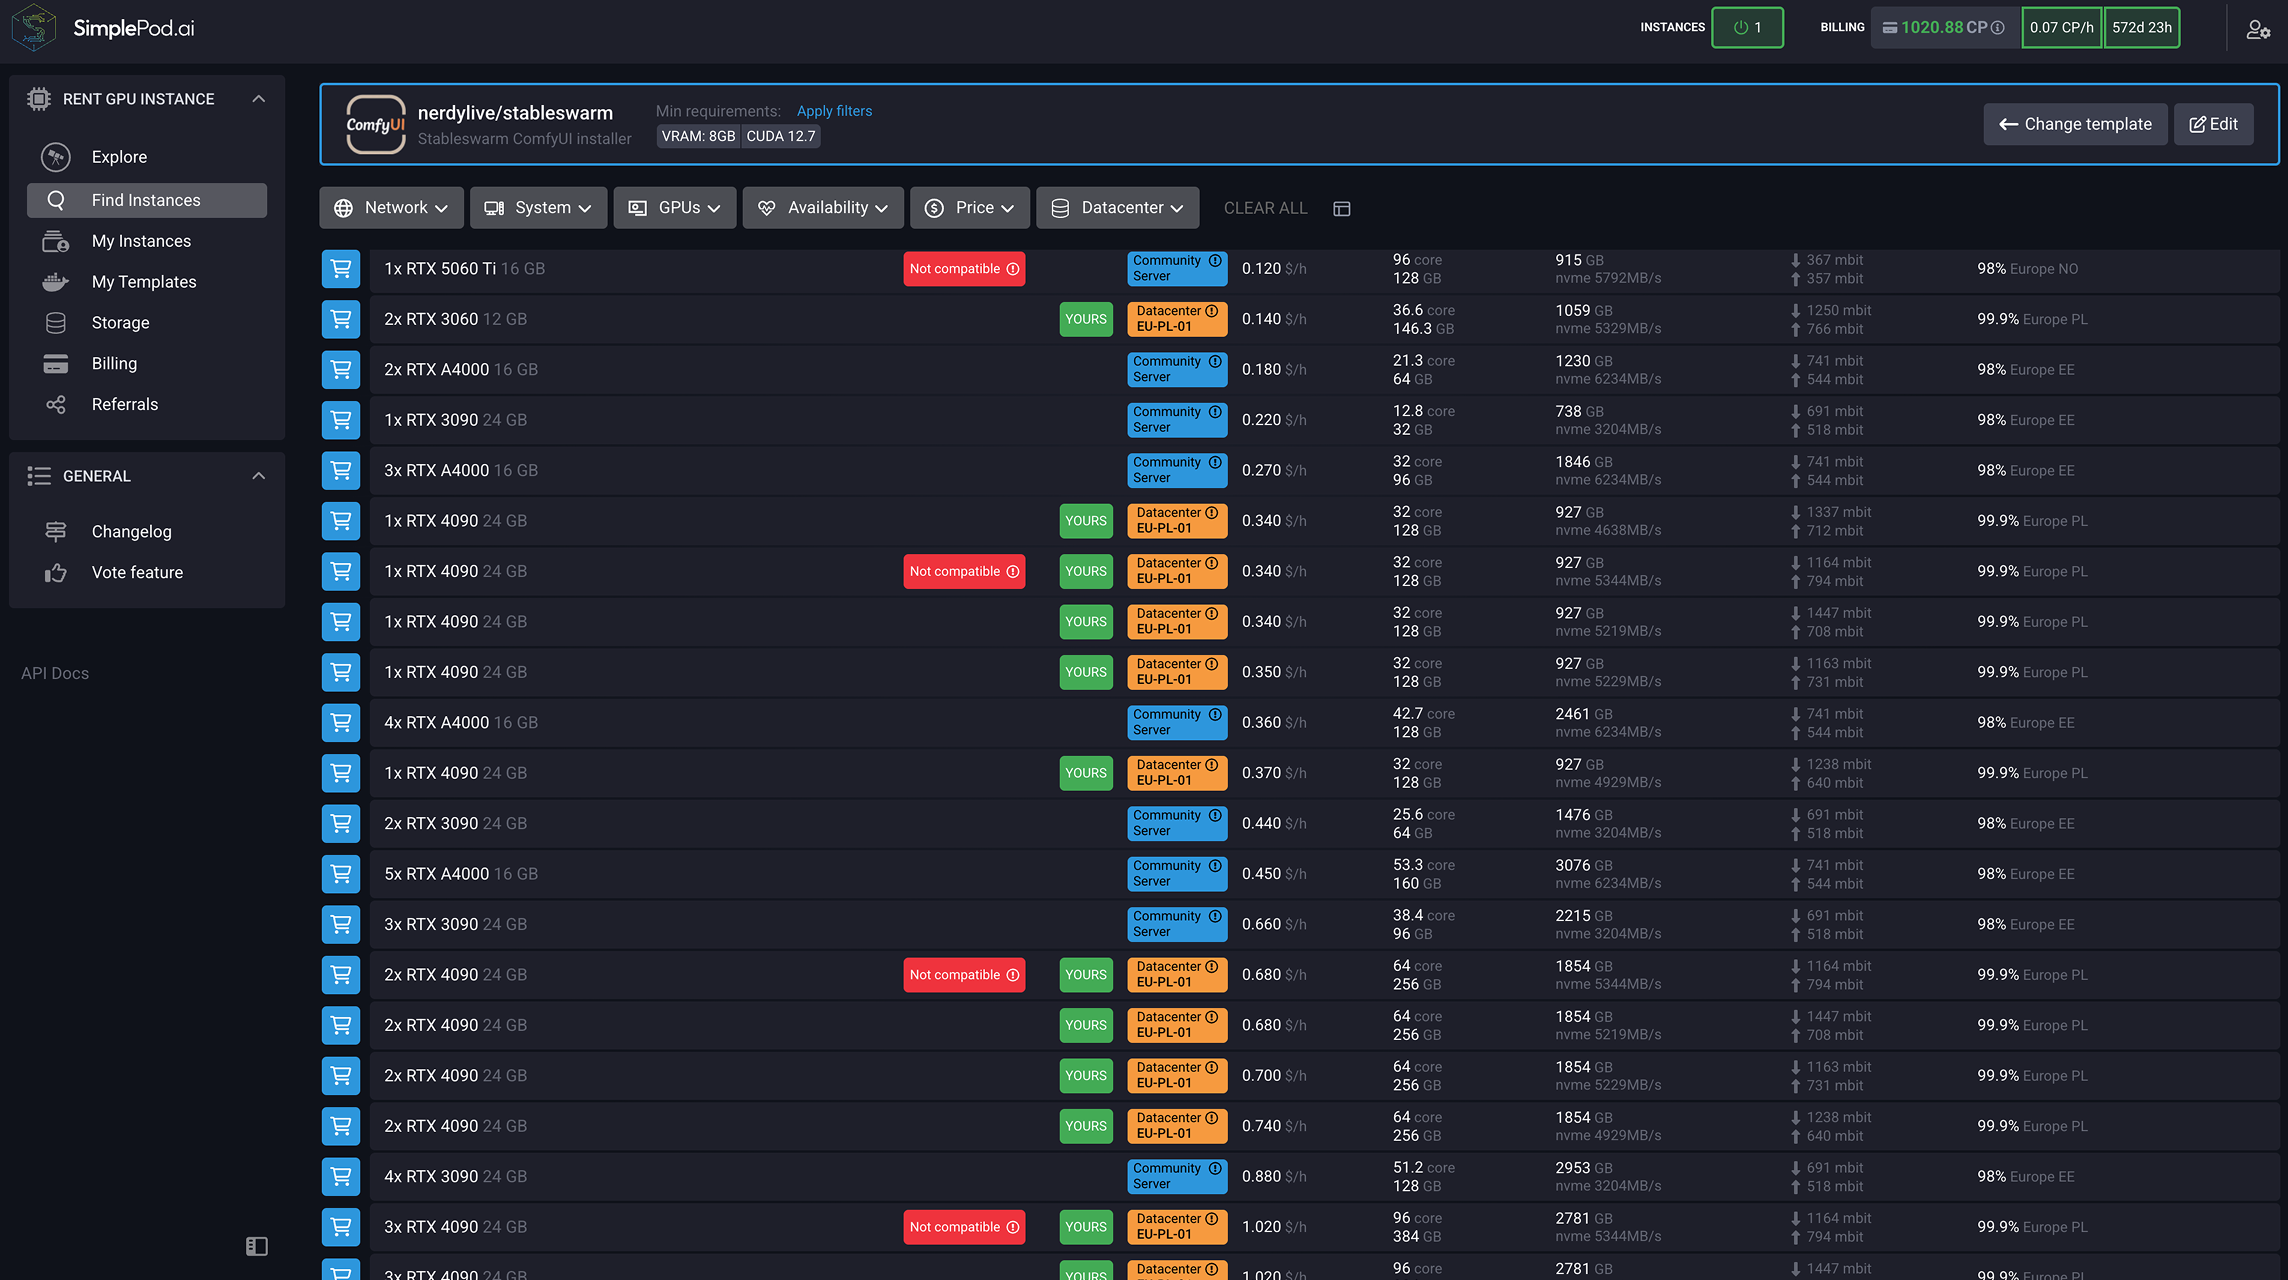
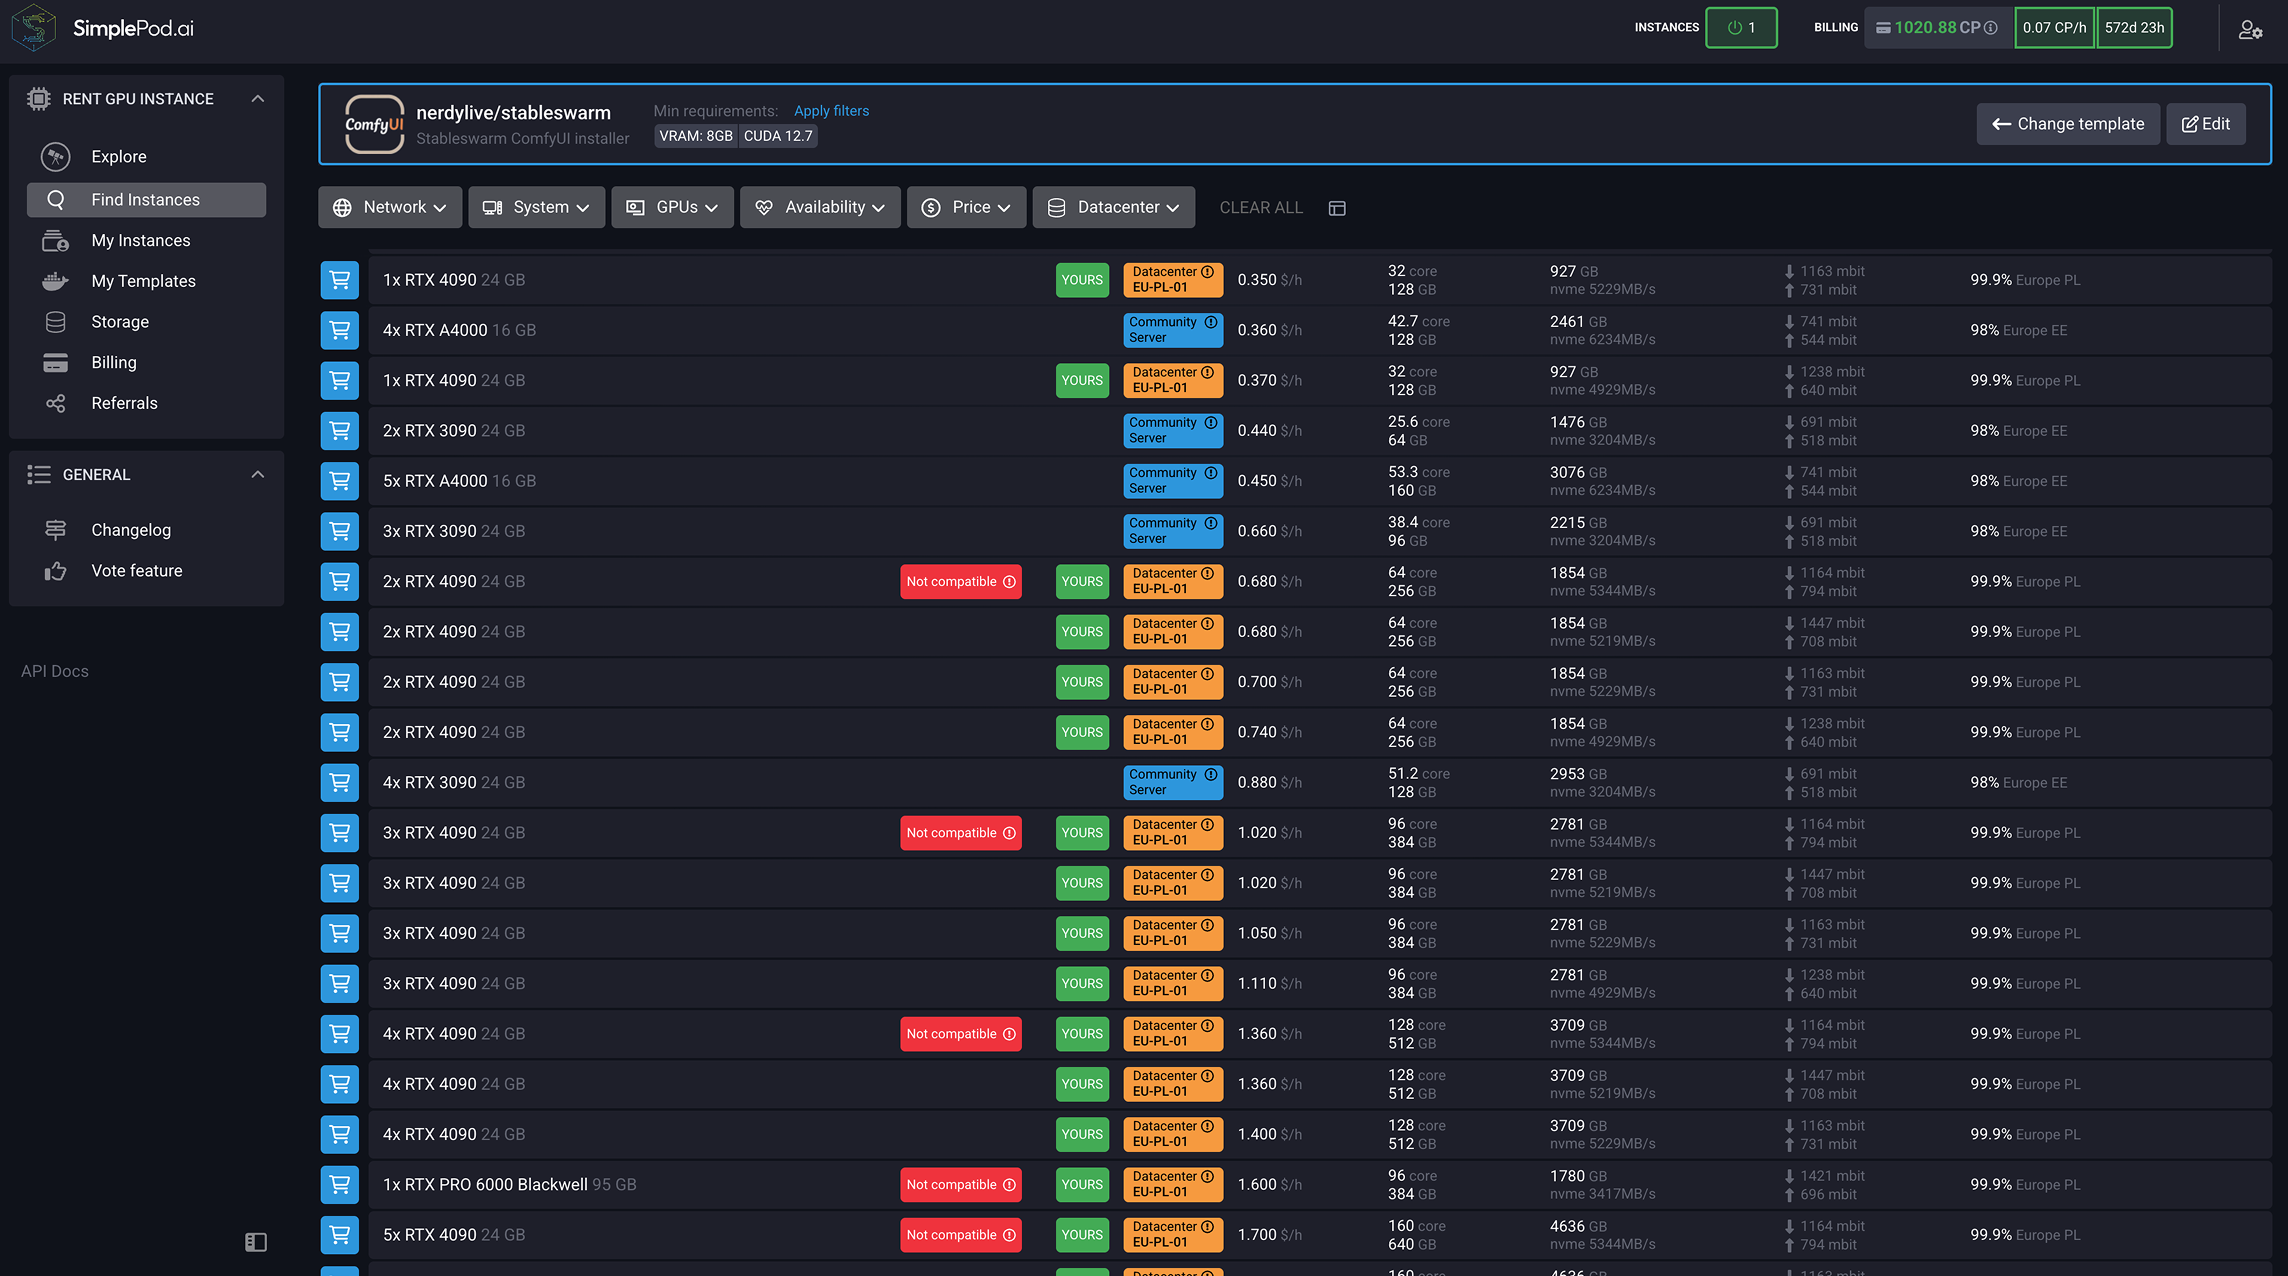
02.
In the Instance Selector, choose your CPU/GPU tier—perfect for both lightweight inference and heavy-duty model training.
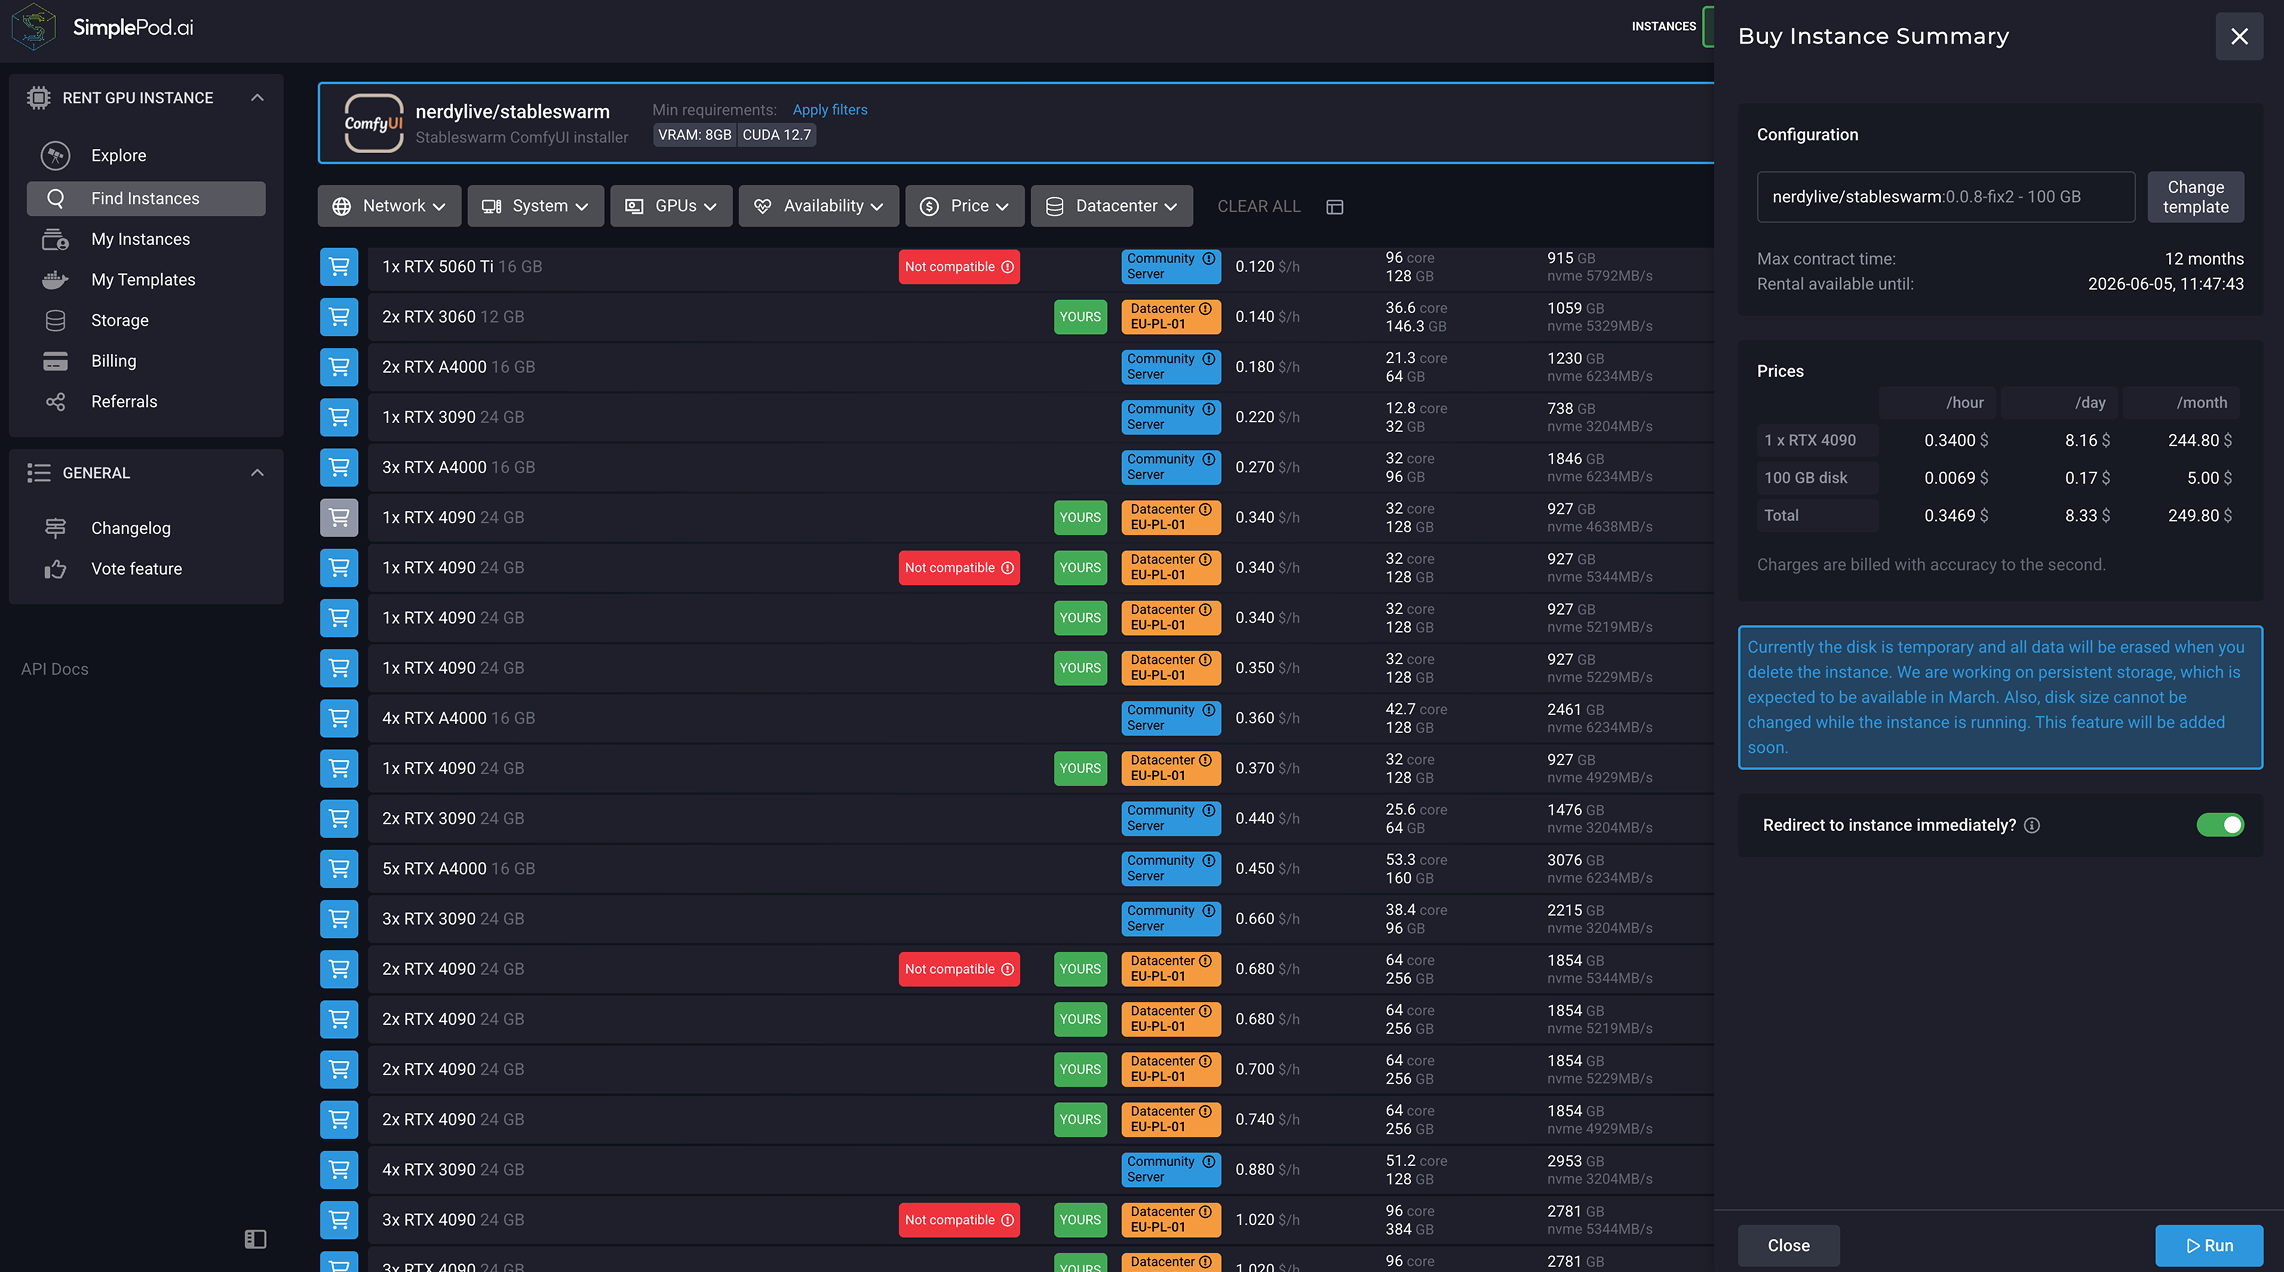
03.
Hit Run to provision your cloud AI instance.
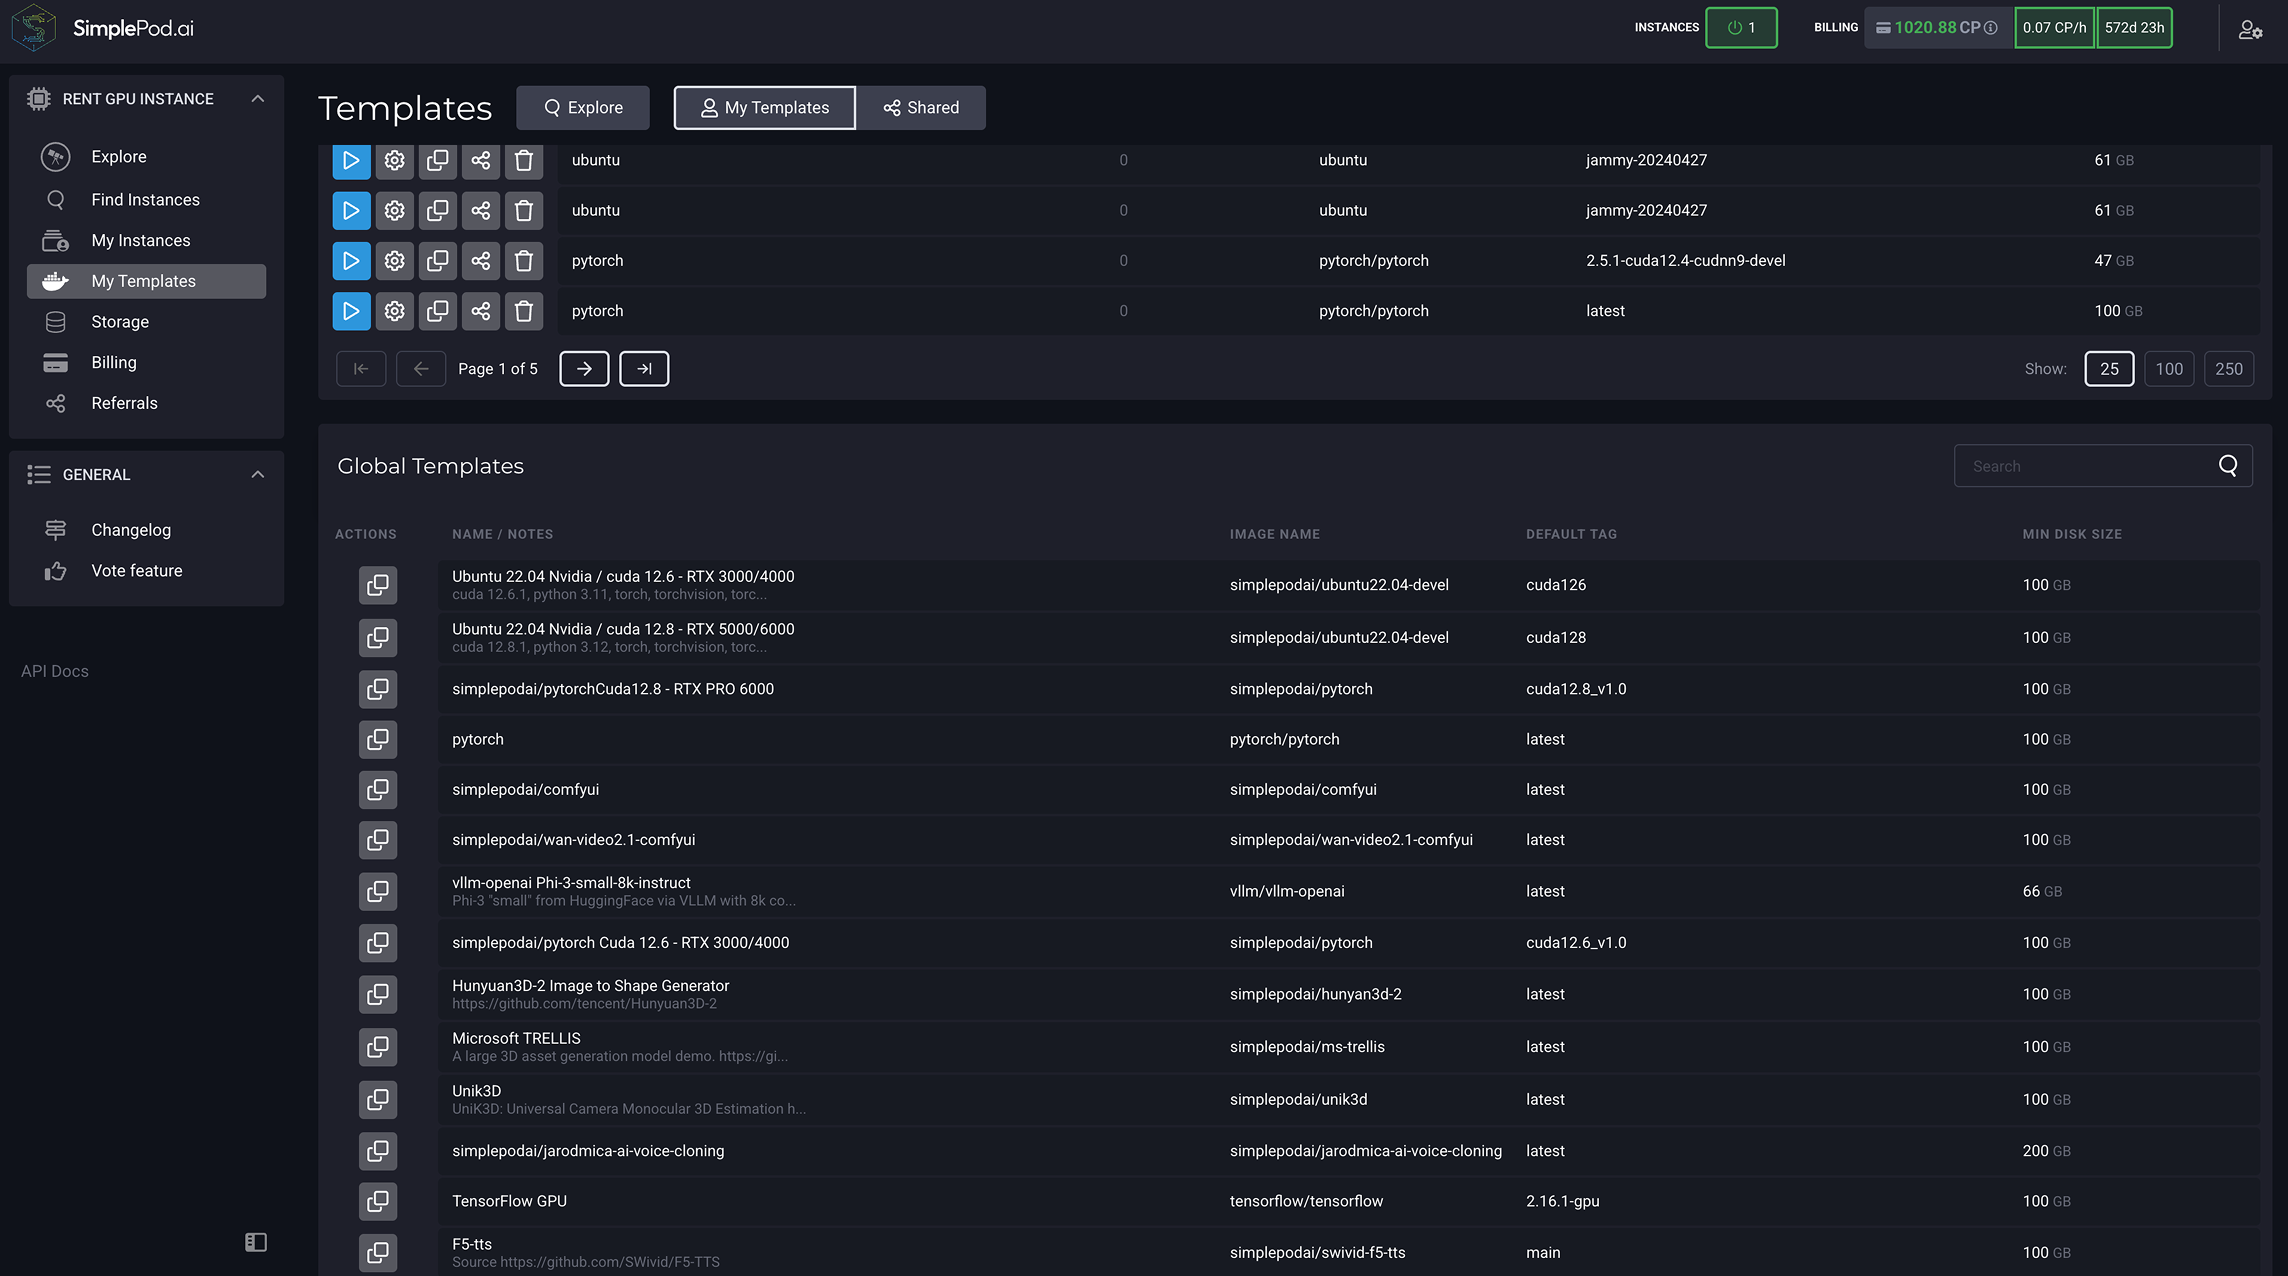
Note:
While provisioning, explore My Templates to revisit past setups or discover new Global Templates.
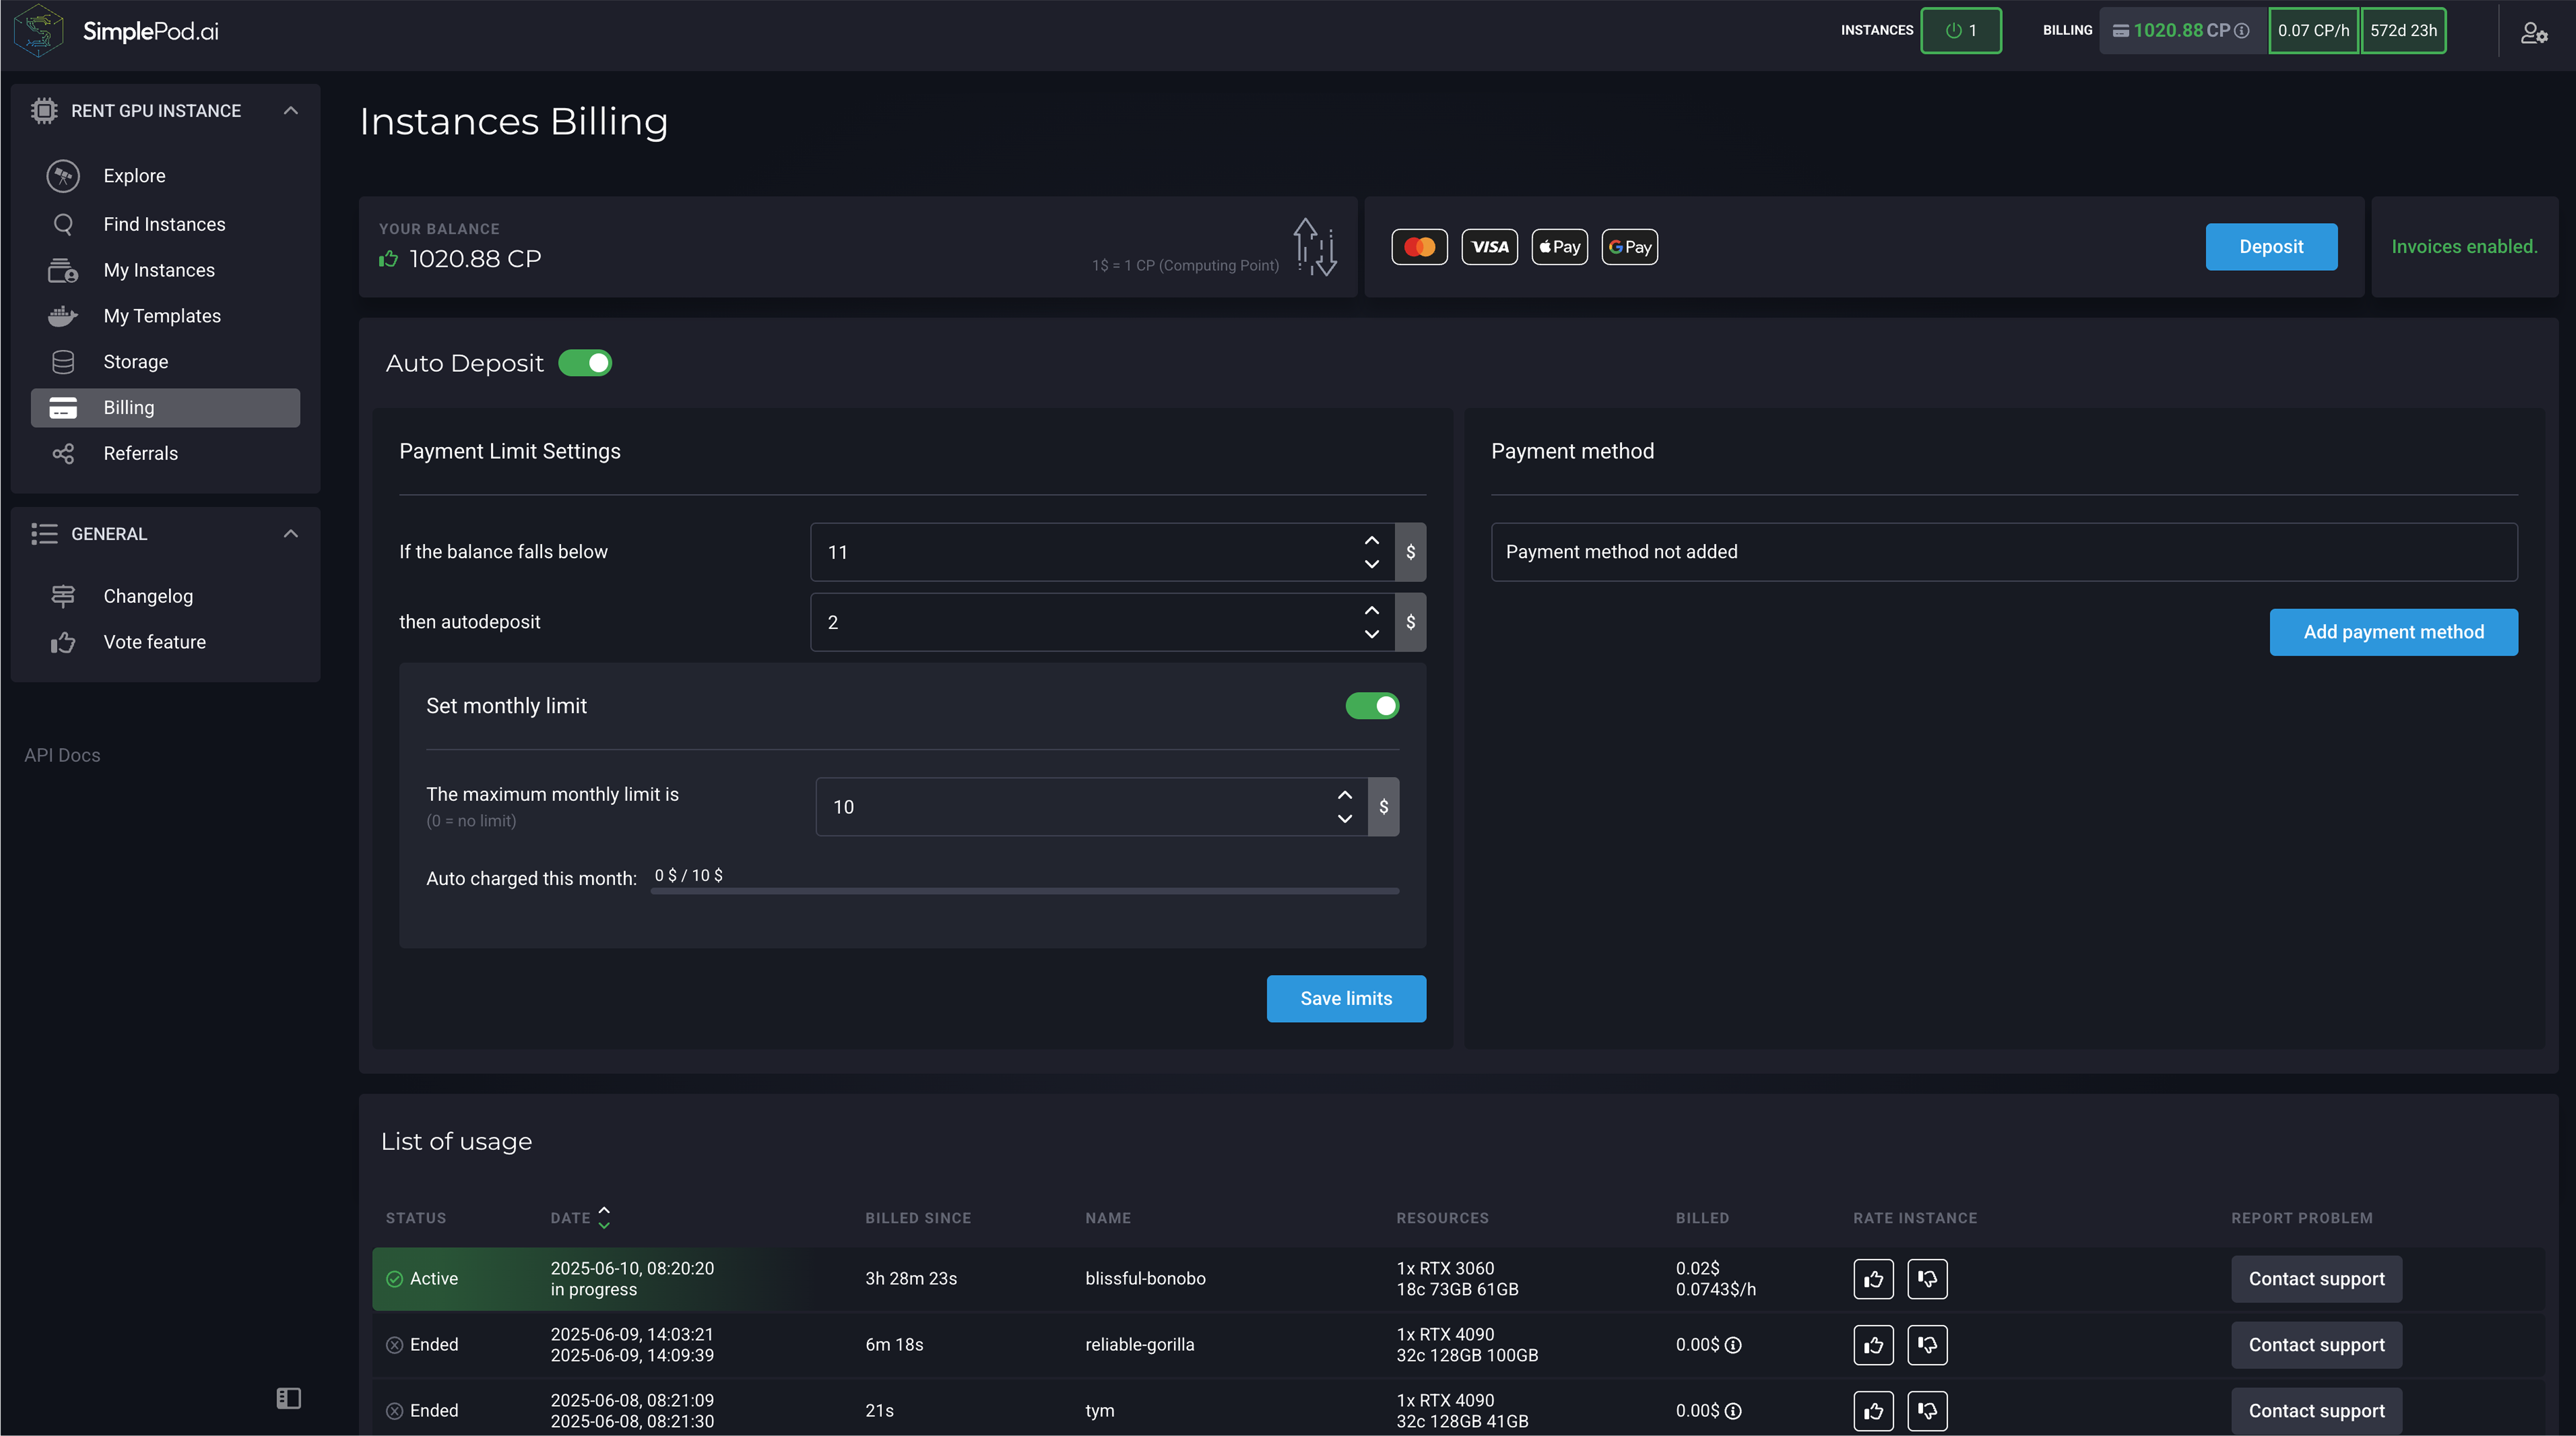
Step 4
Billing Dashboard & Cost Management
Switch to the Billing tab to review your account balance, linked payment methods, and auto-deposit settings. Consult the List of usage for a complete history of launched instances and deposit records, essential for cloud AI cost monitoring.
Step 5
Monitoring Cloud Instance: CPU, GPU & System Metrics
Under My Instances, you’ll see real-time metrics:
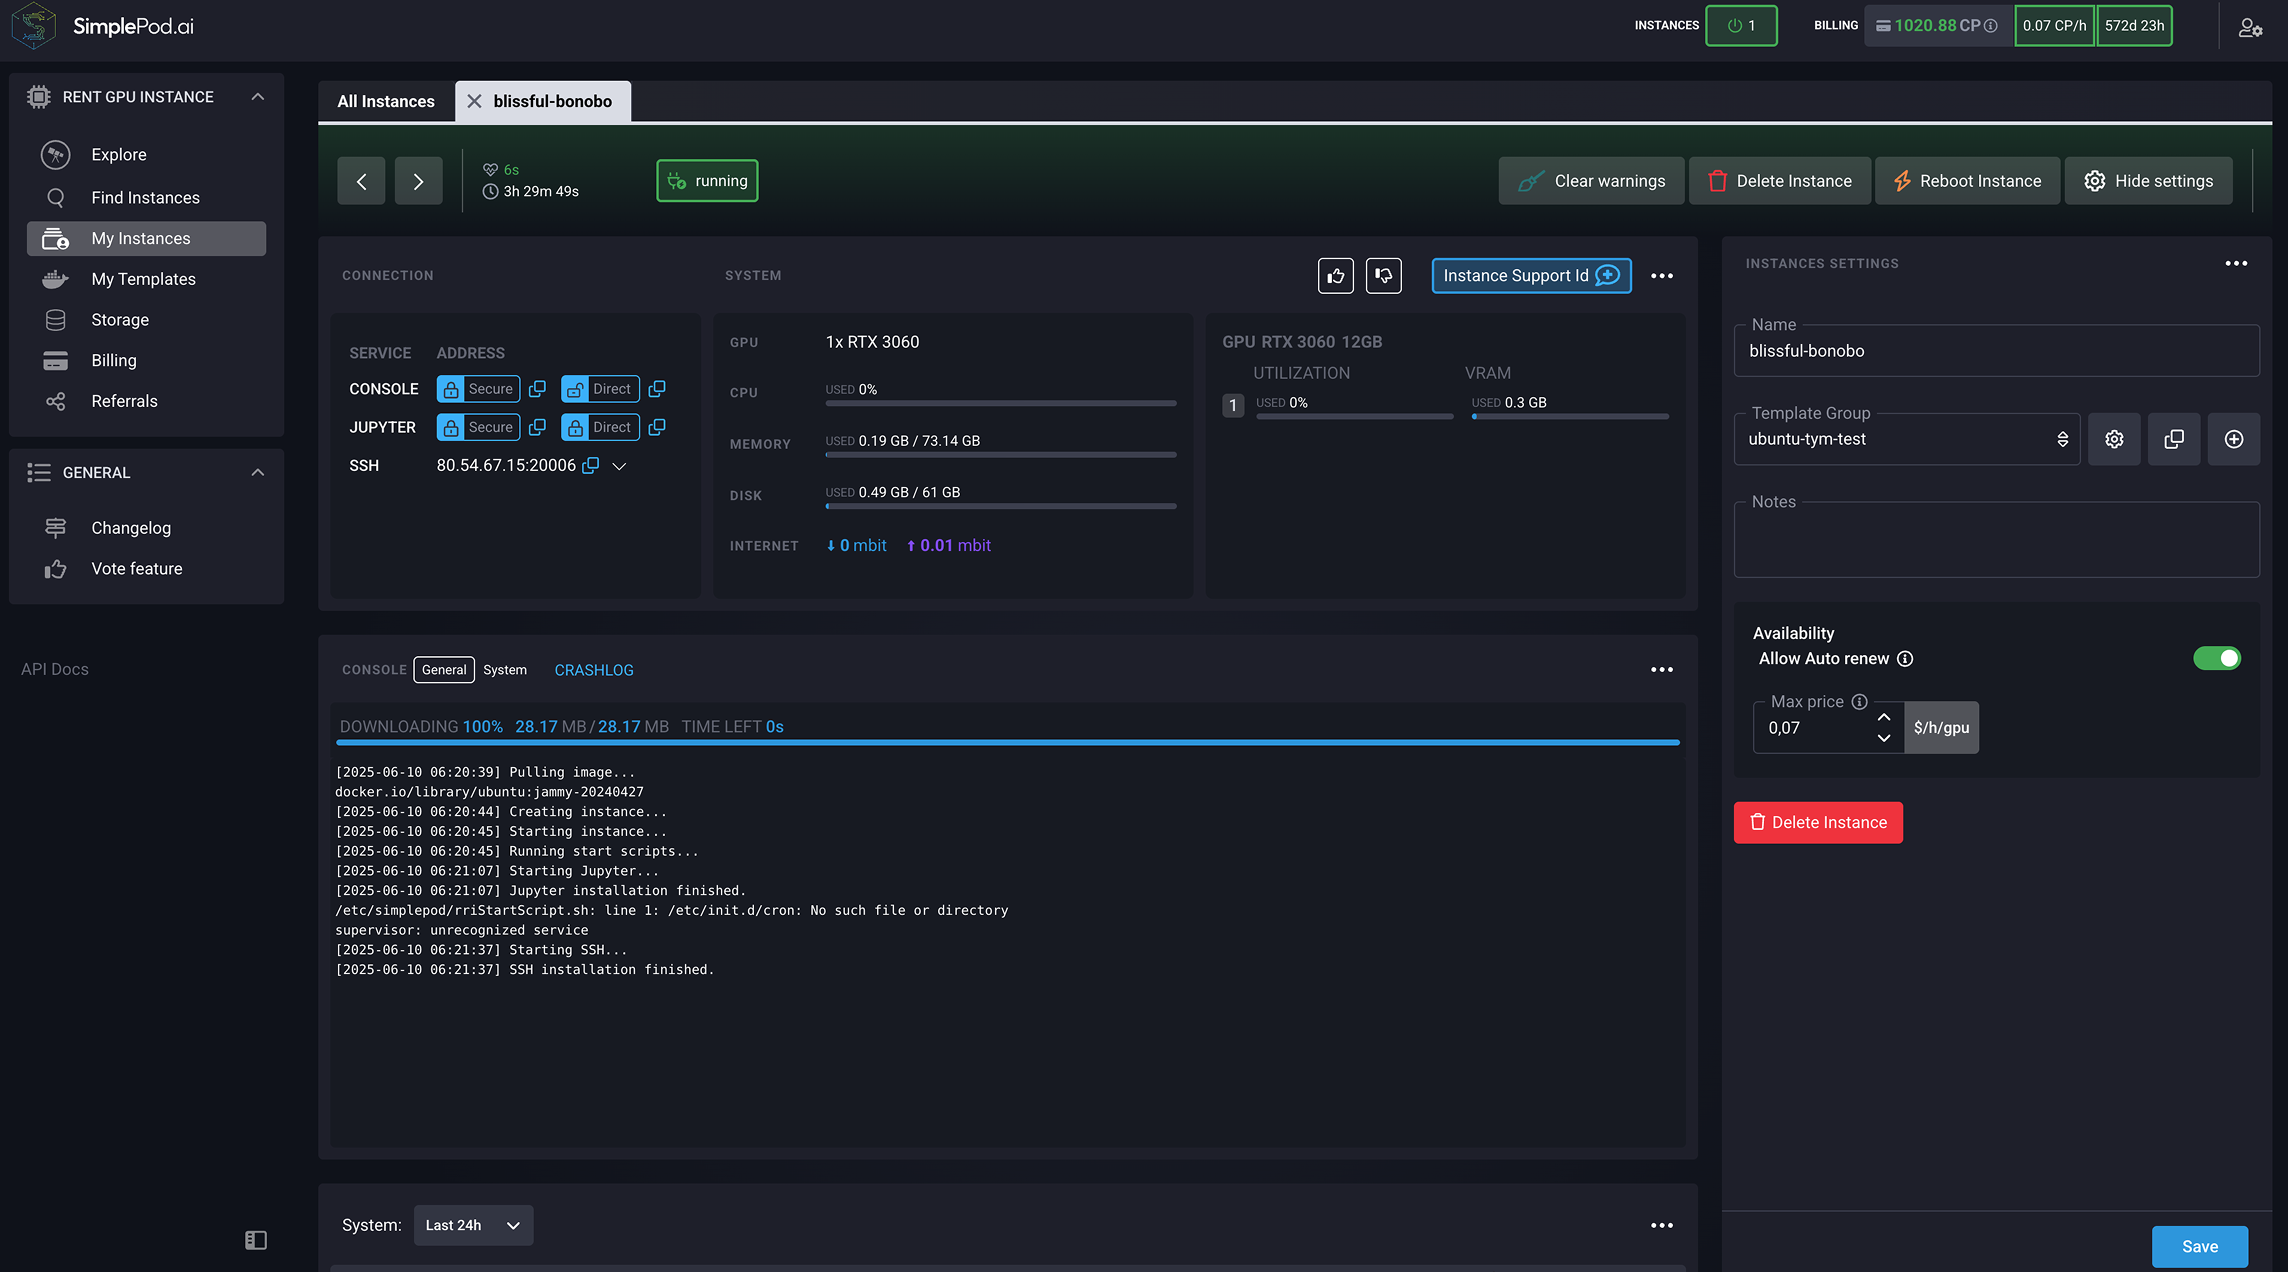
- CPU & GPU utilization
- Console access and system information
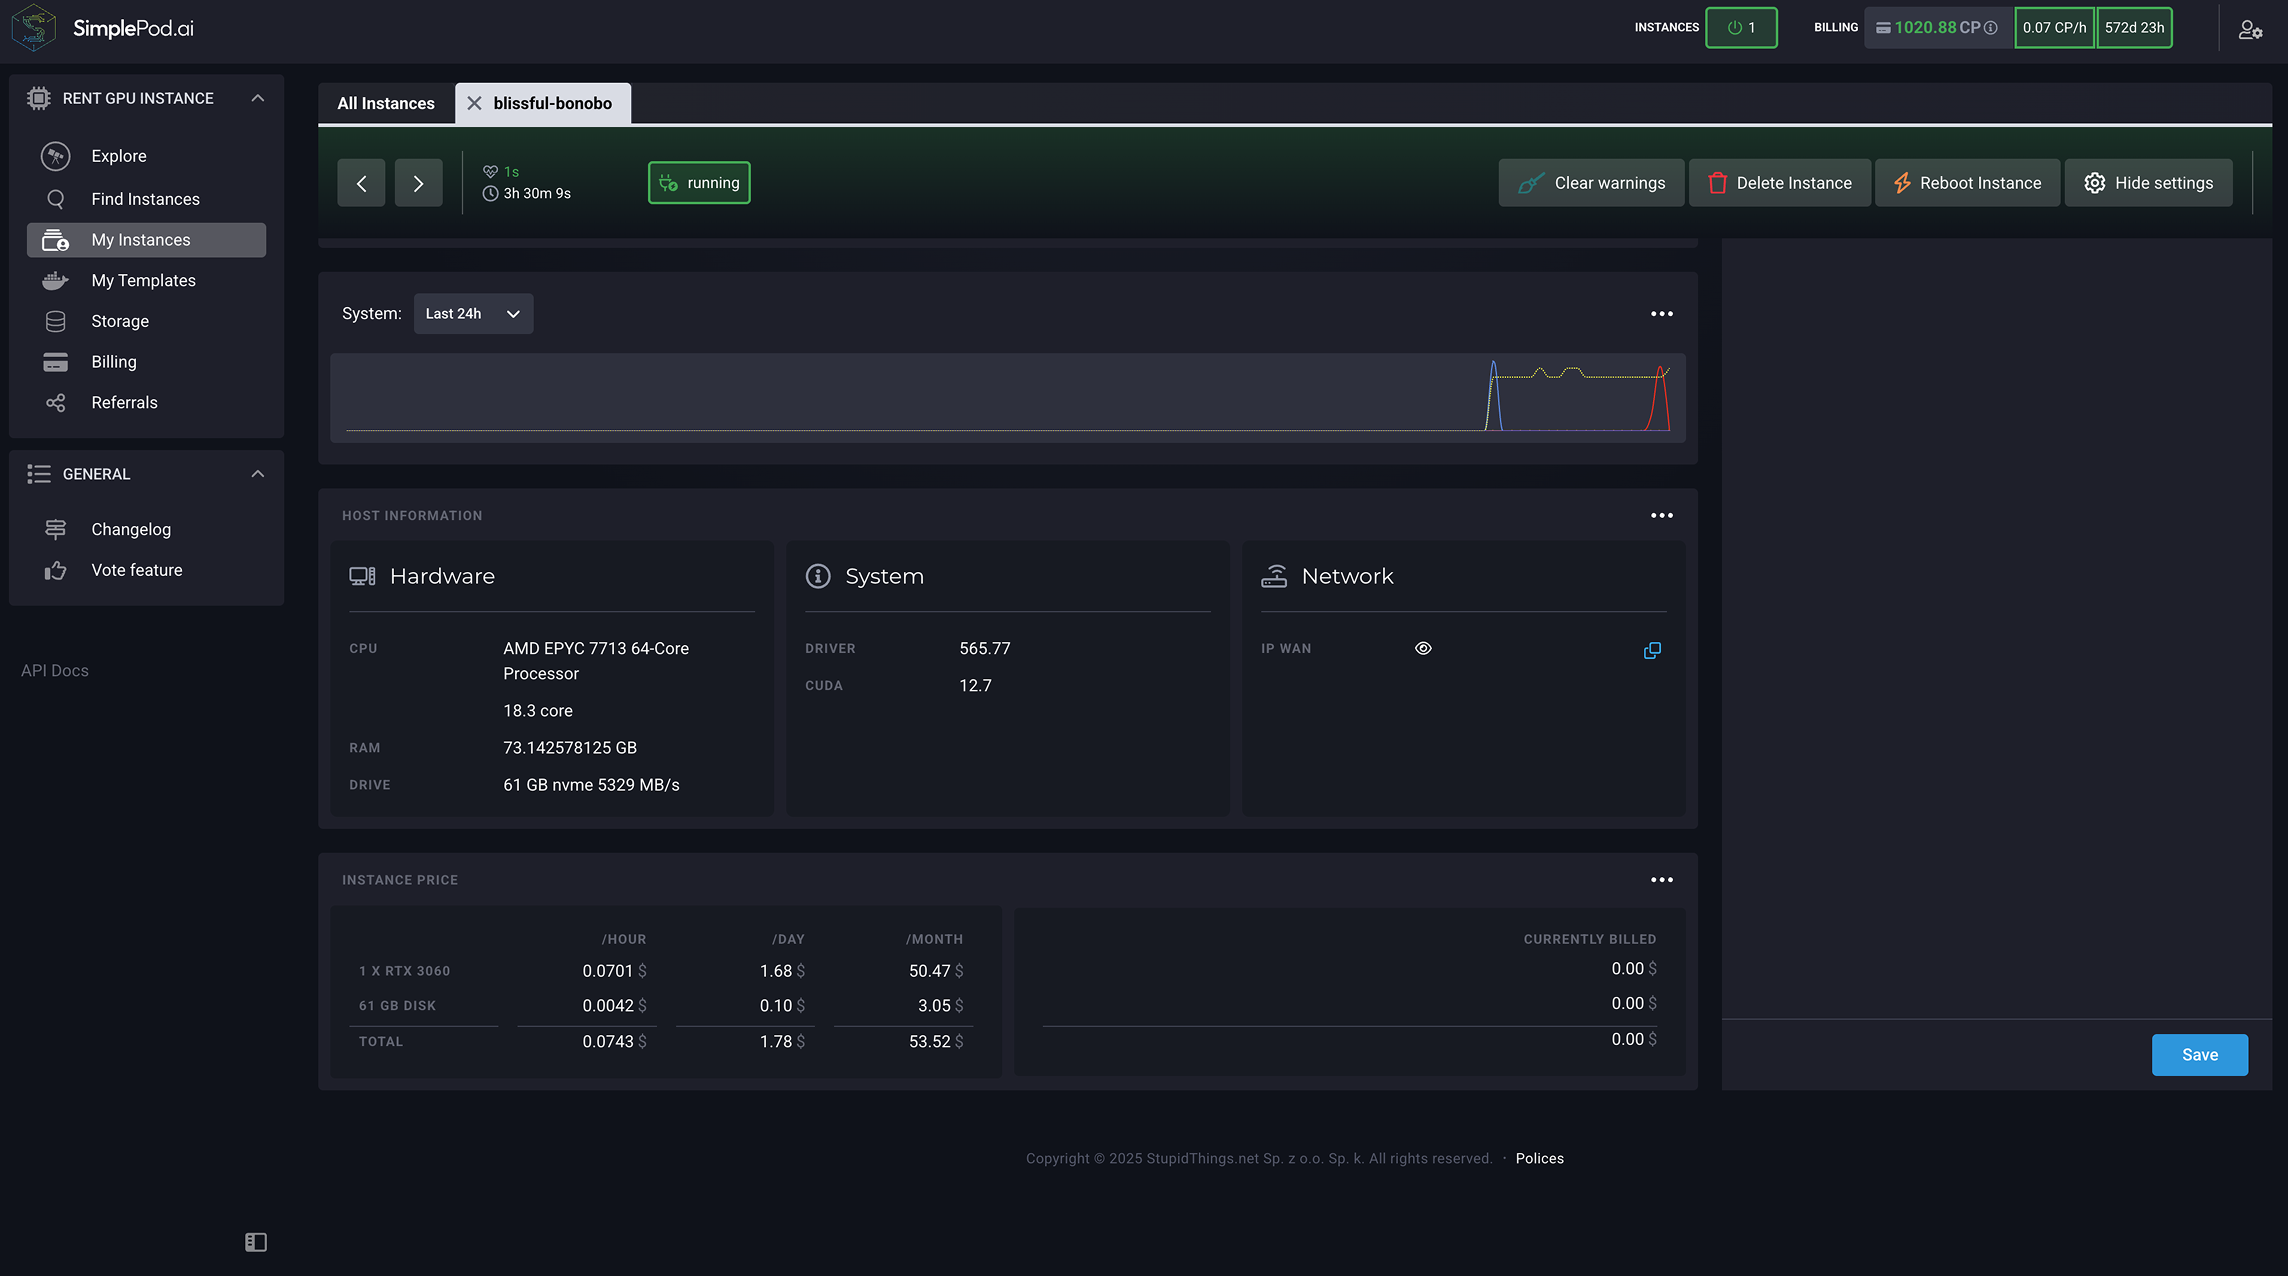
- Current hourly rate and estimated cost
Step 6
Configure the ComfyUI Environment: Quick vs. Customized Installation
Click Configure UI to open the setup console. Choose between:
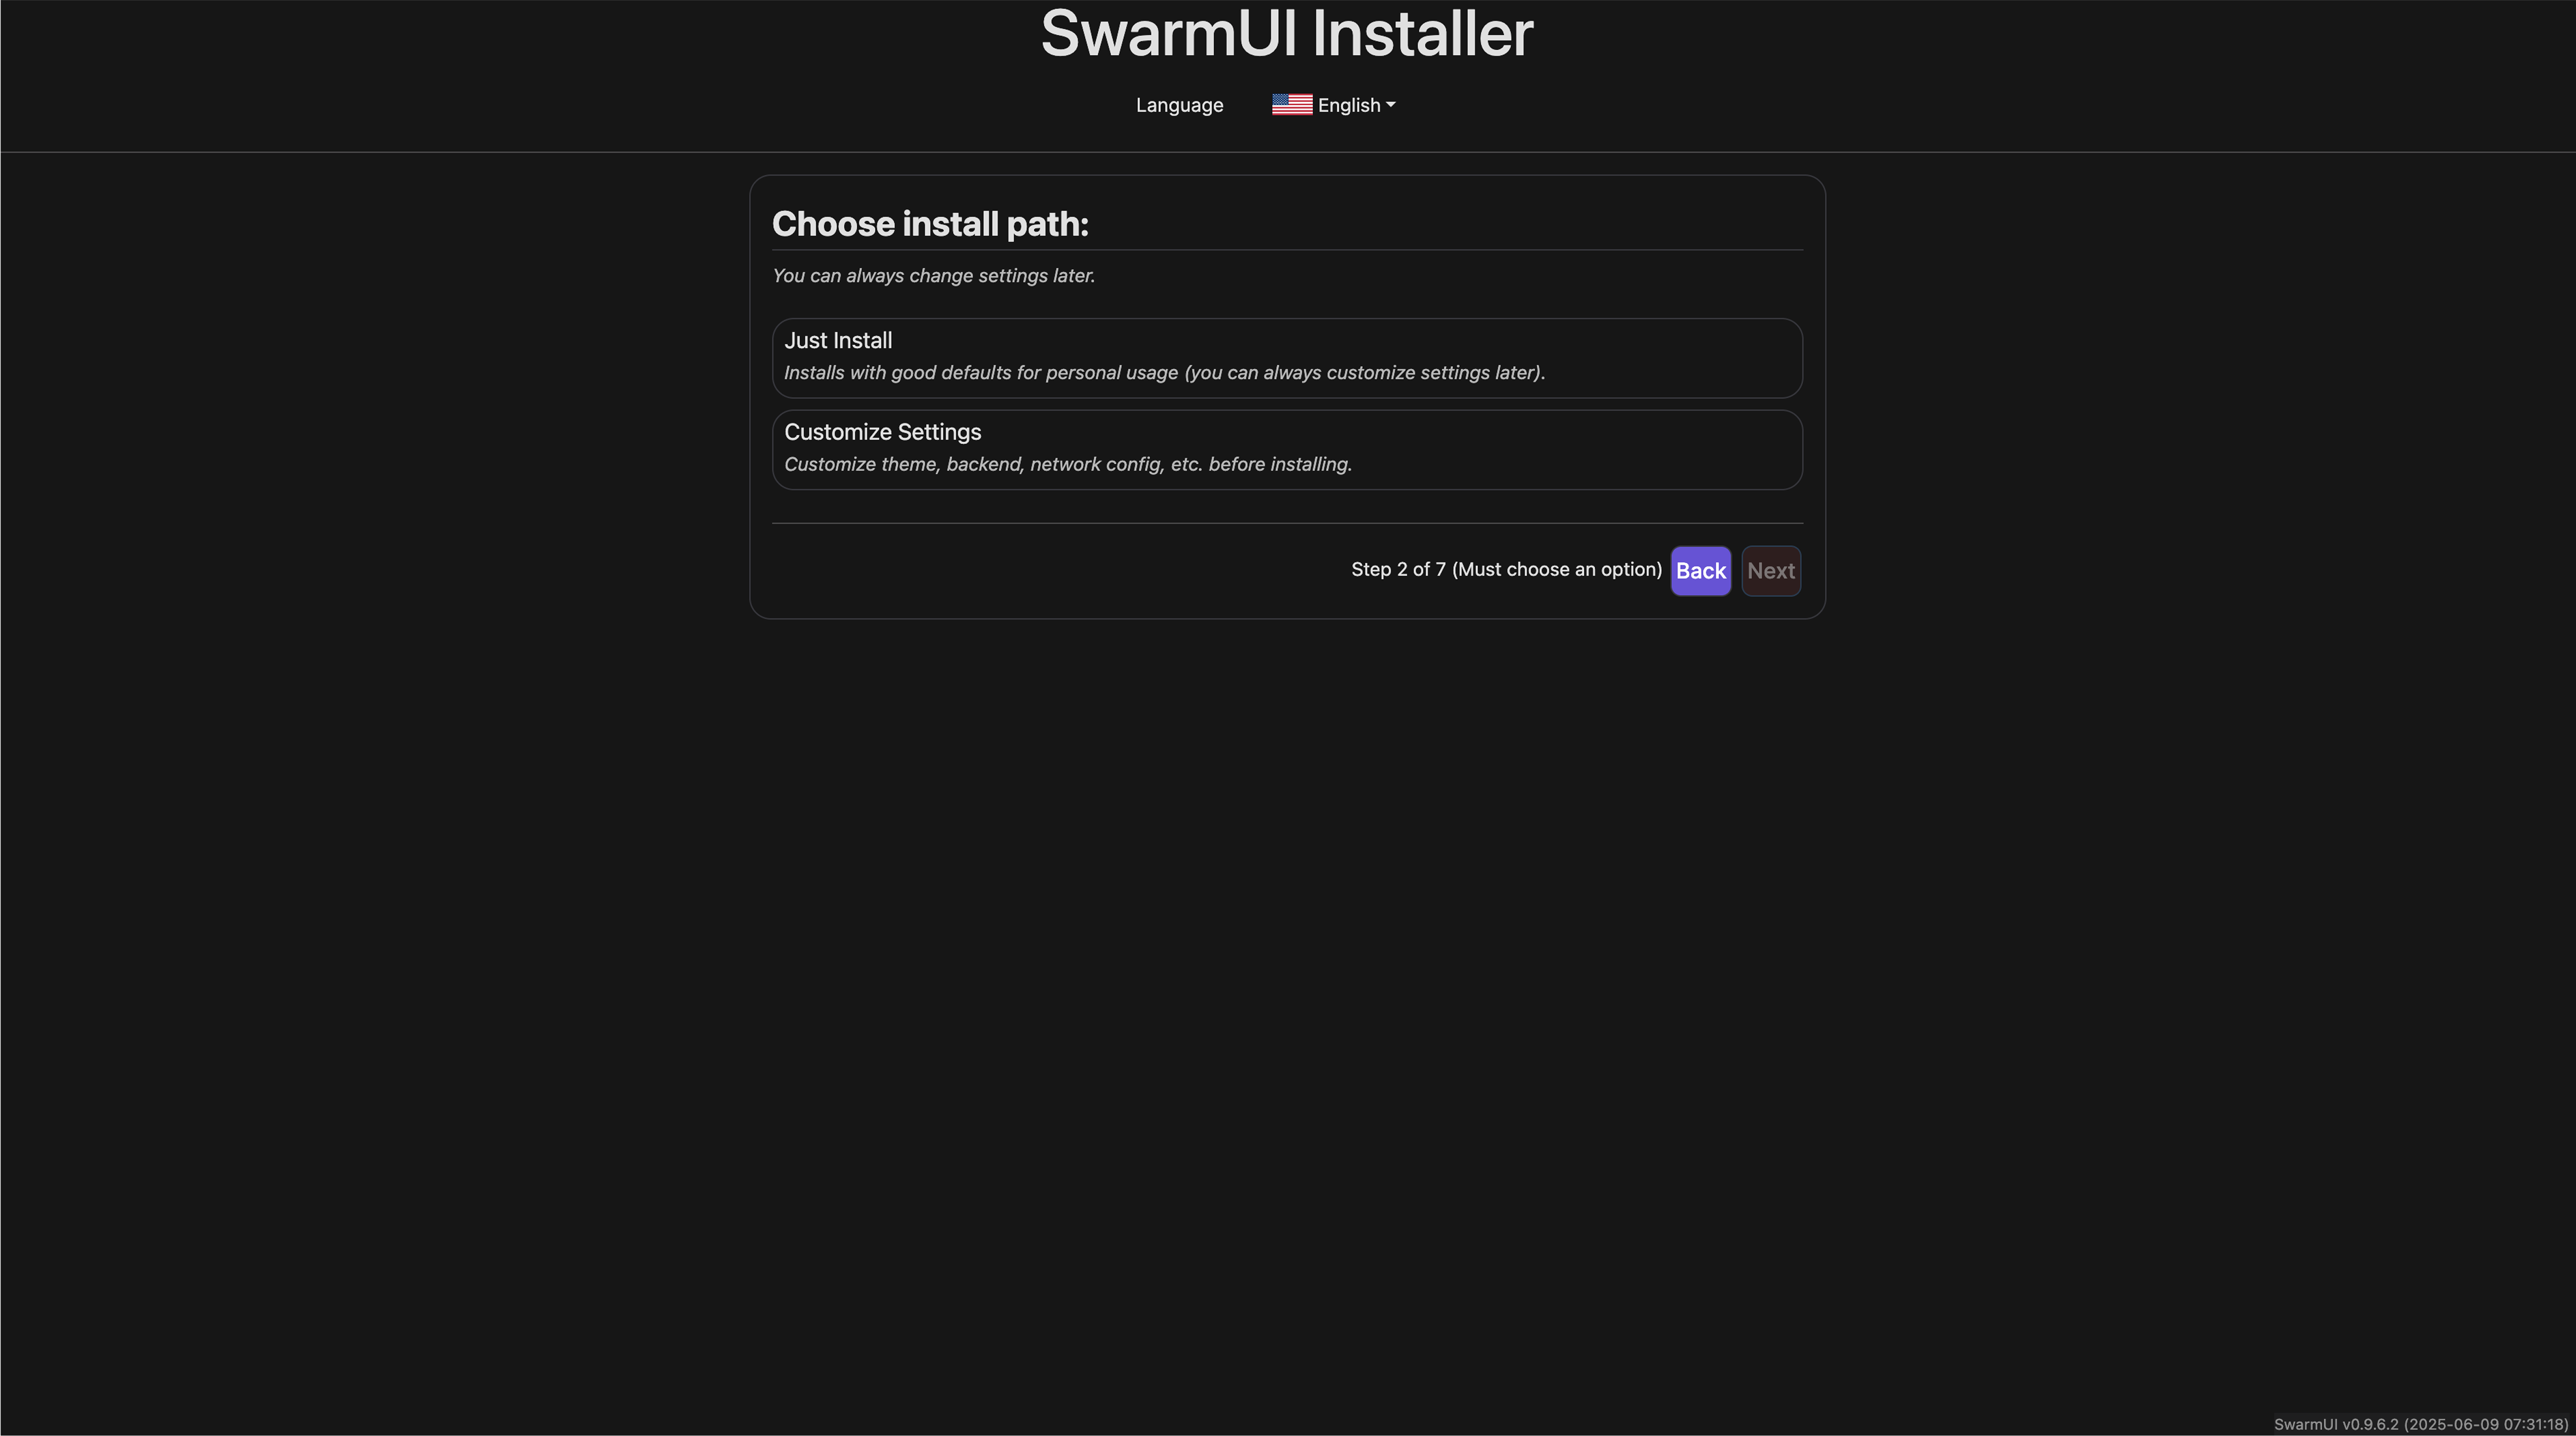
- Quick Install for one-click AI environment deployment
- Customized Installation for granular control (user roles, network settings, advanced flags)
Step 7
AI Model Installation & Download
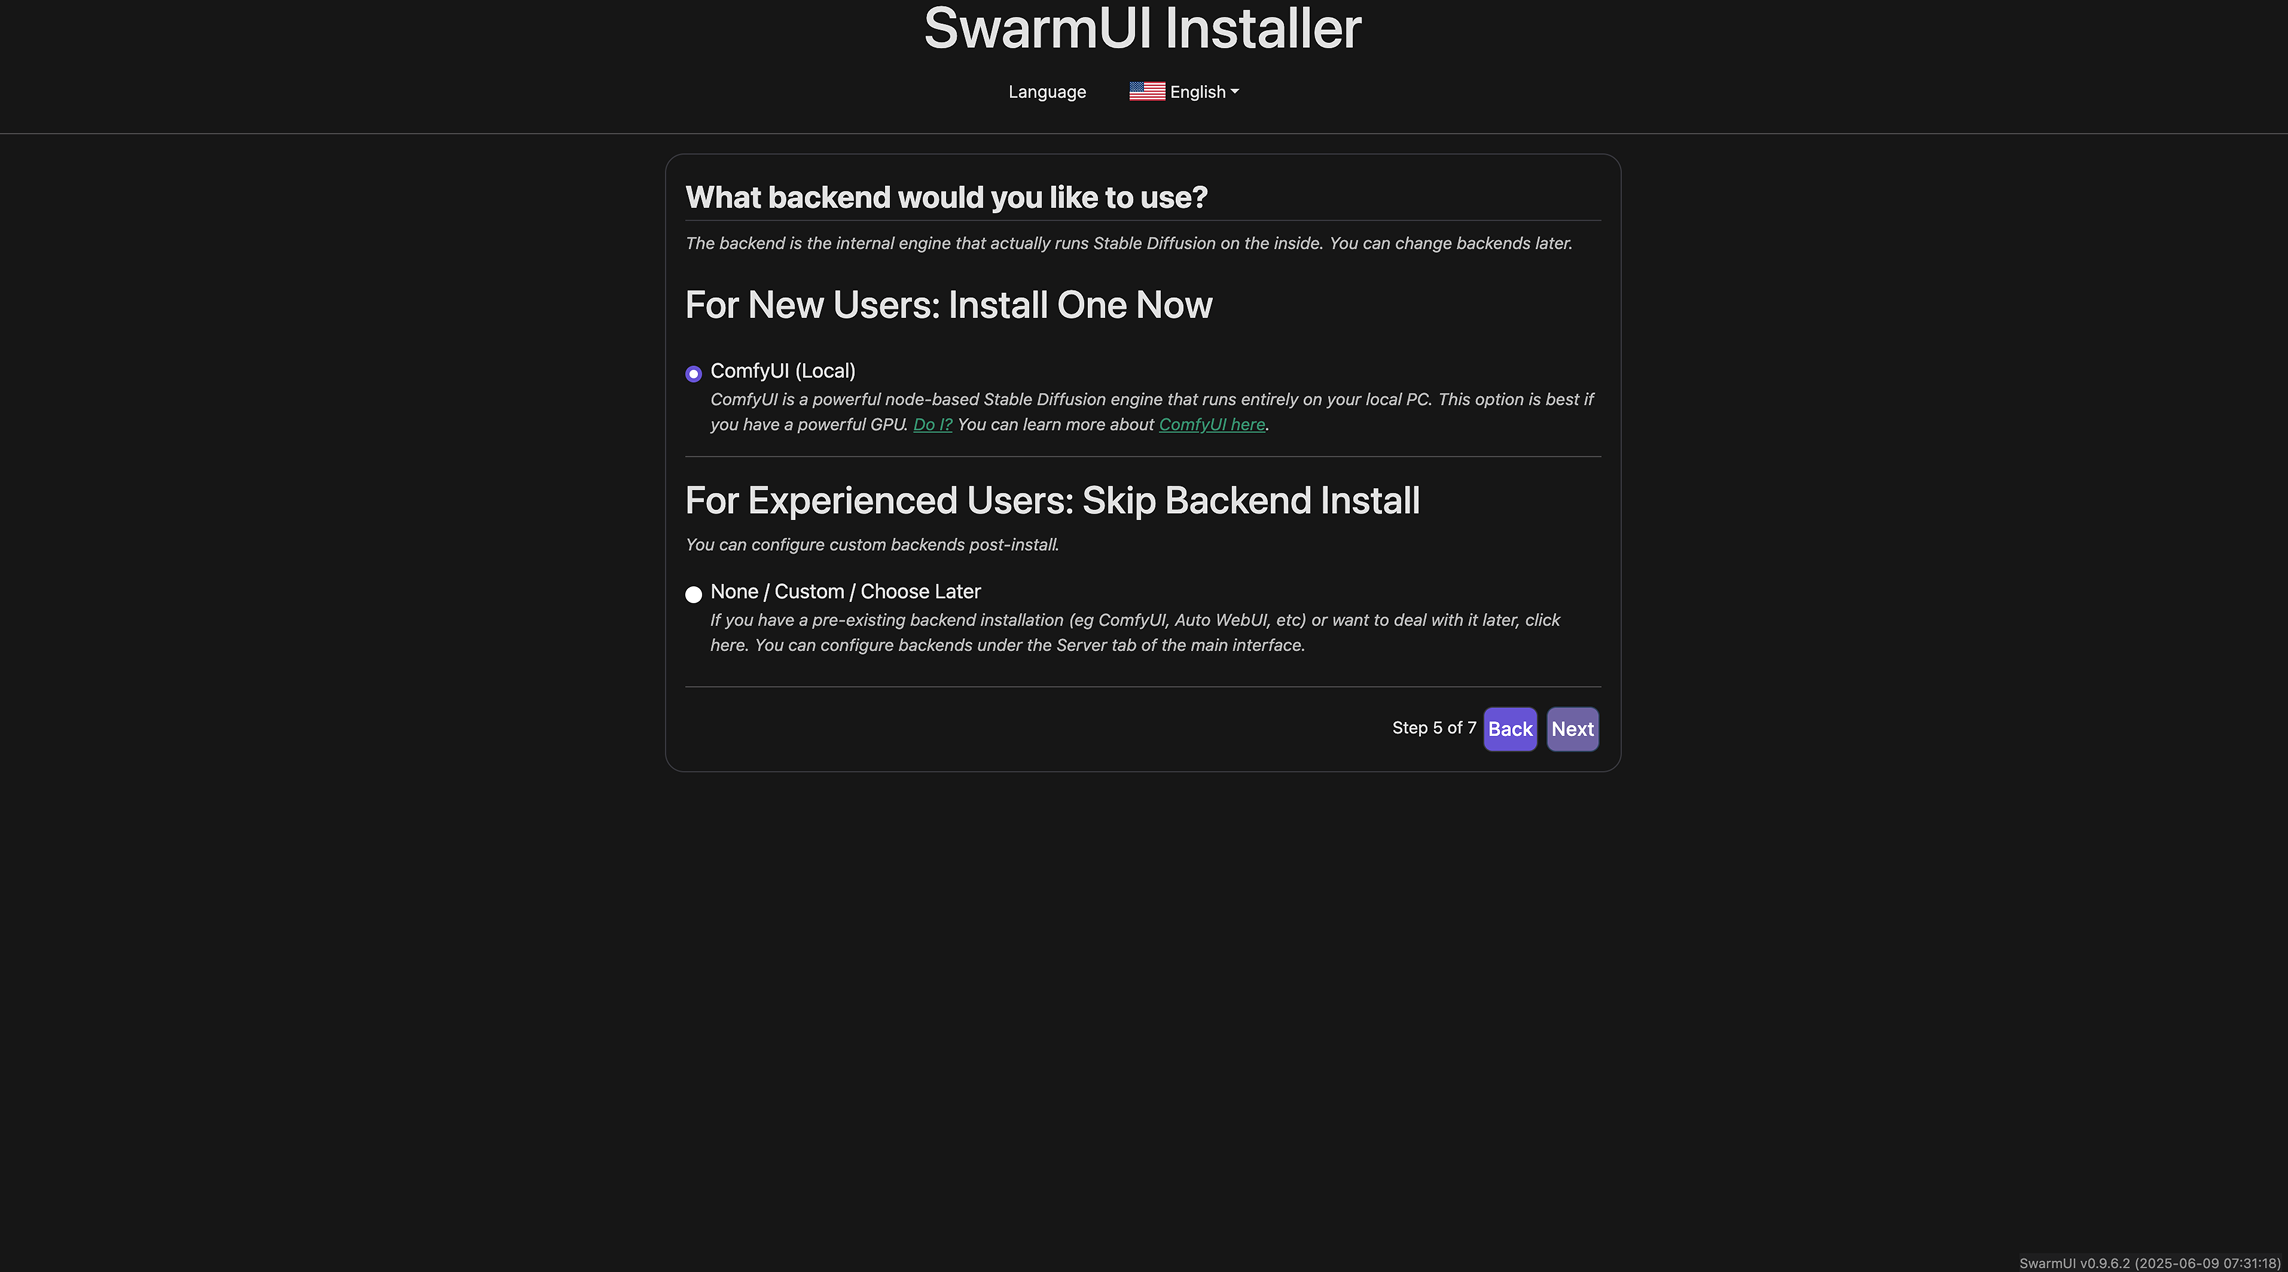
Select New User or Advanced User profile.
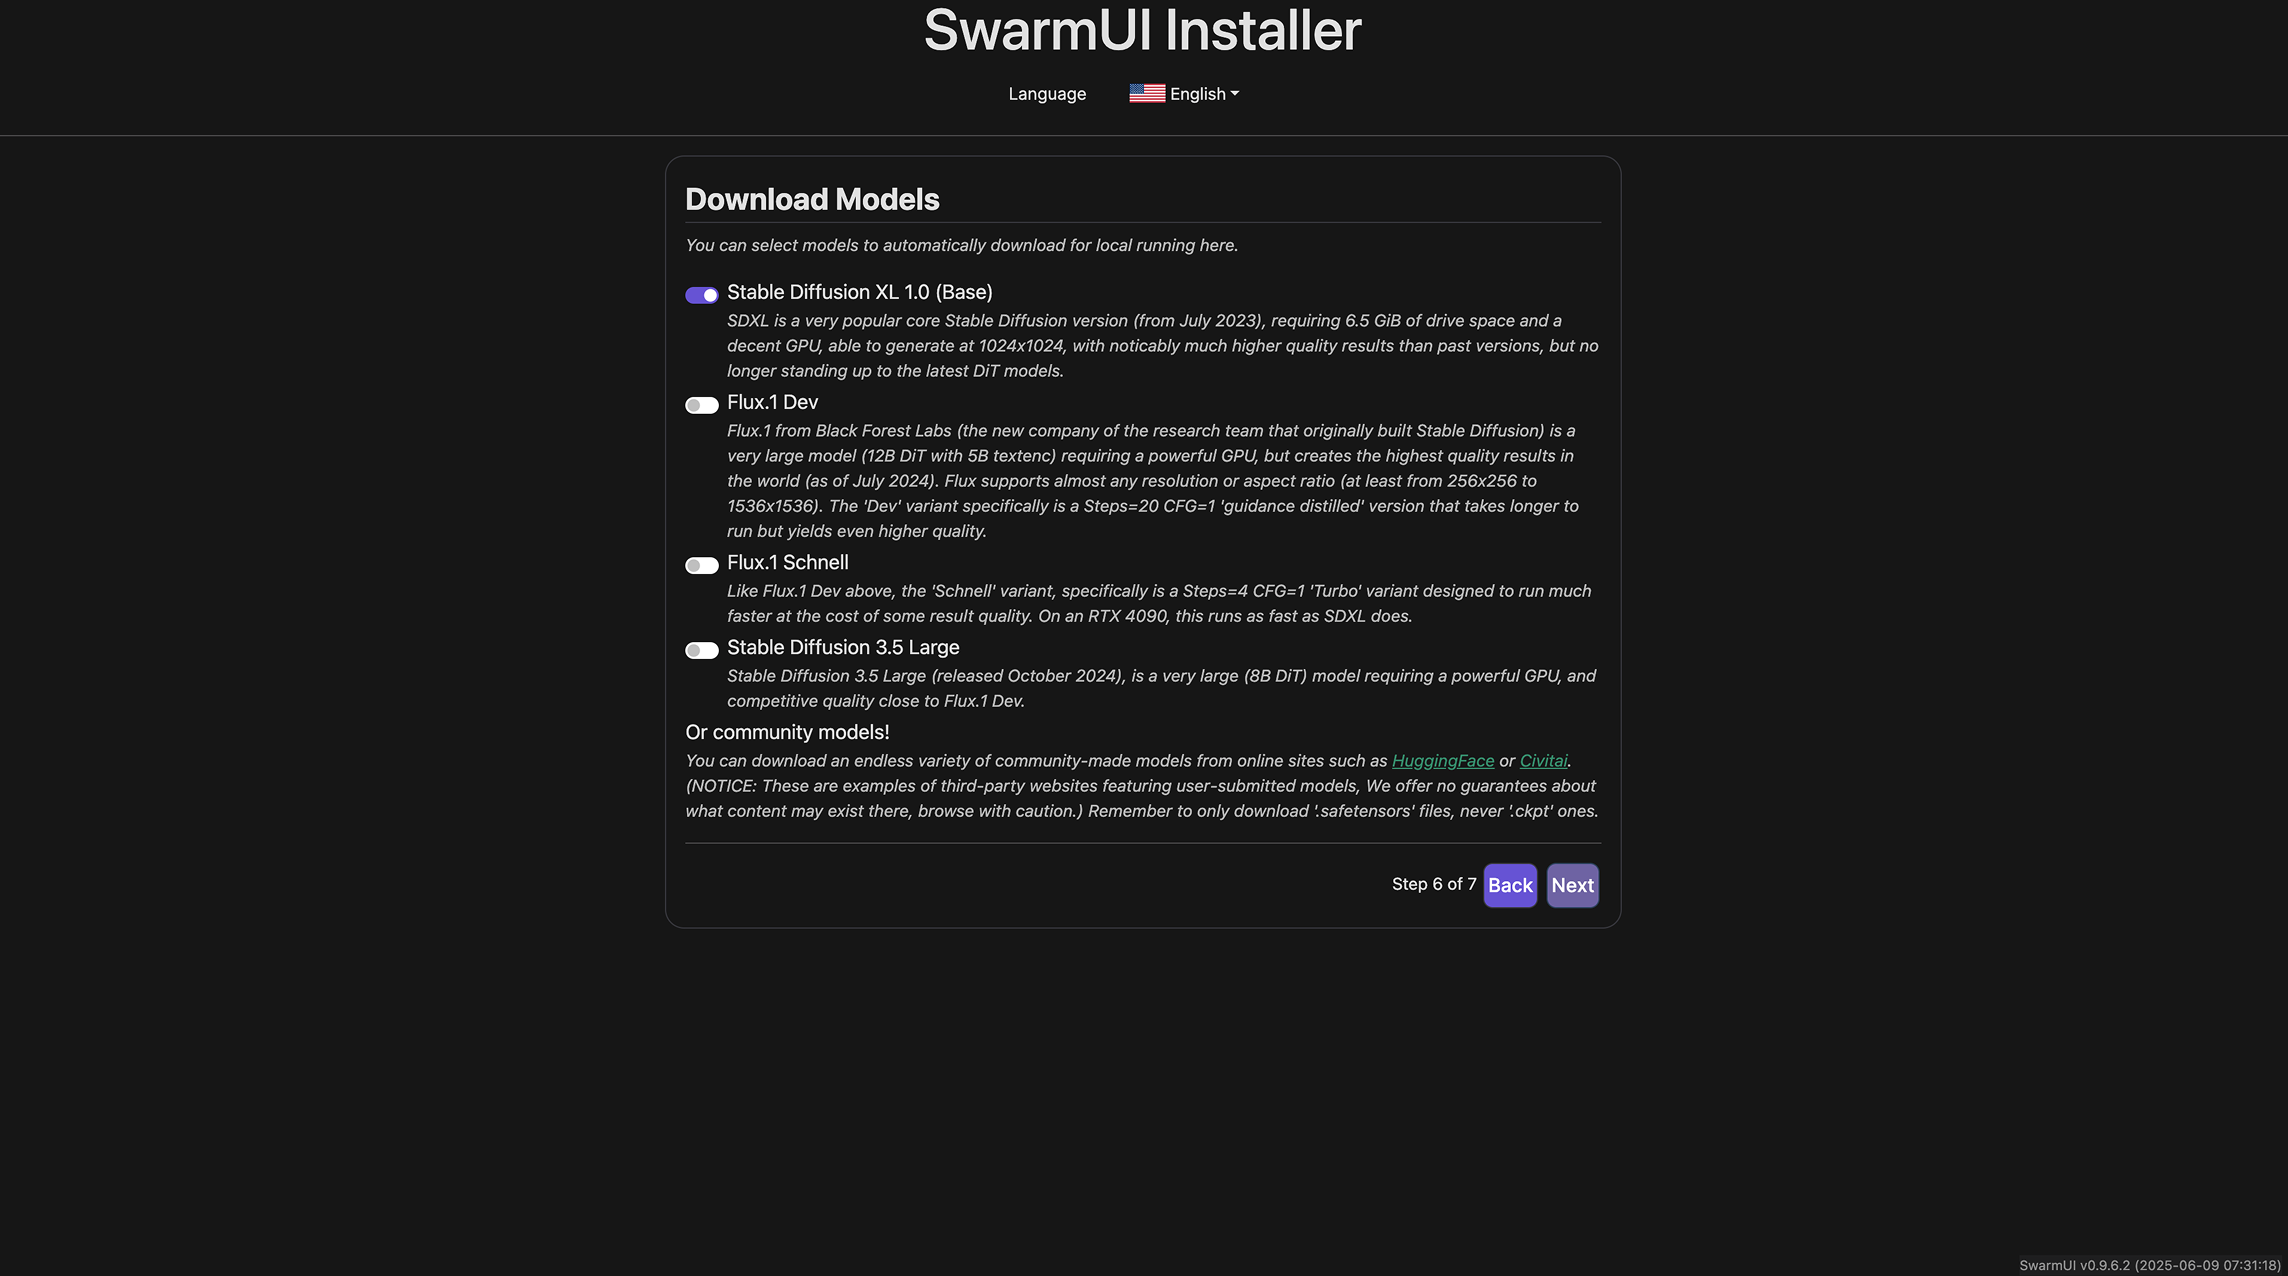
Choose the AI models you need (e.g., Stable Diffusion, ControlNet).
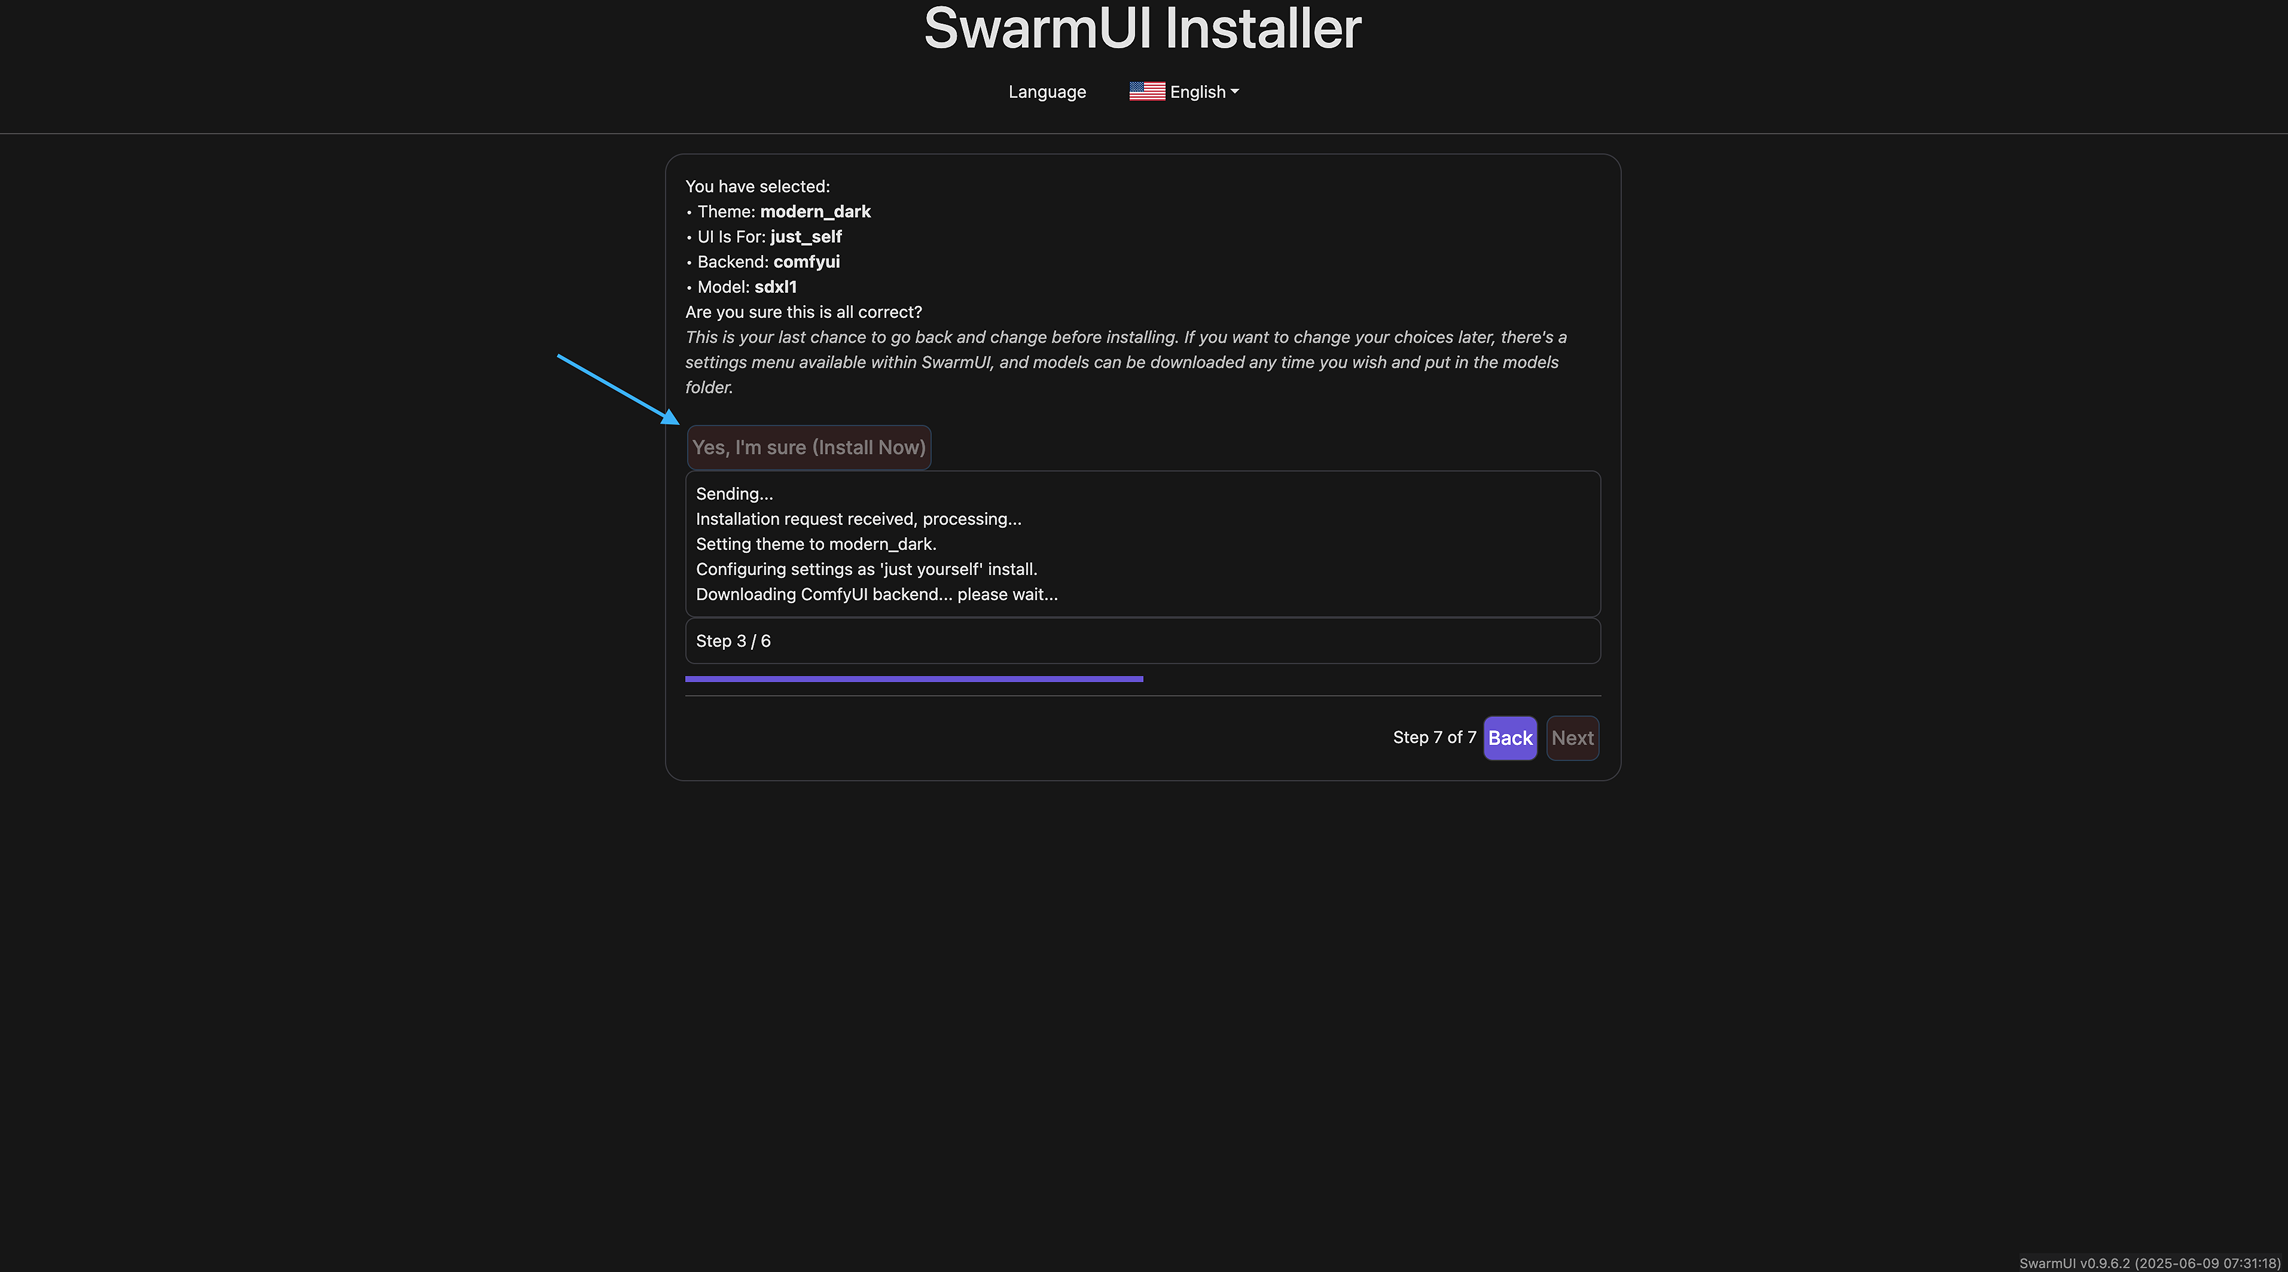
Click Next and wait for model installation to finish. This prepares your workspace for AI content generation.
Step 8
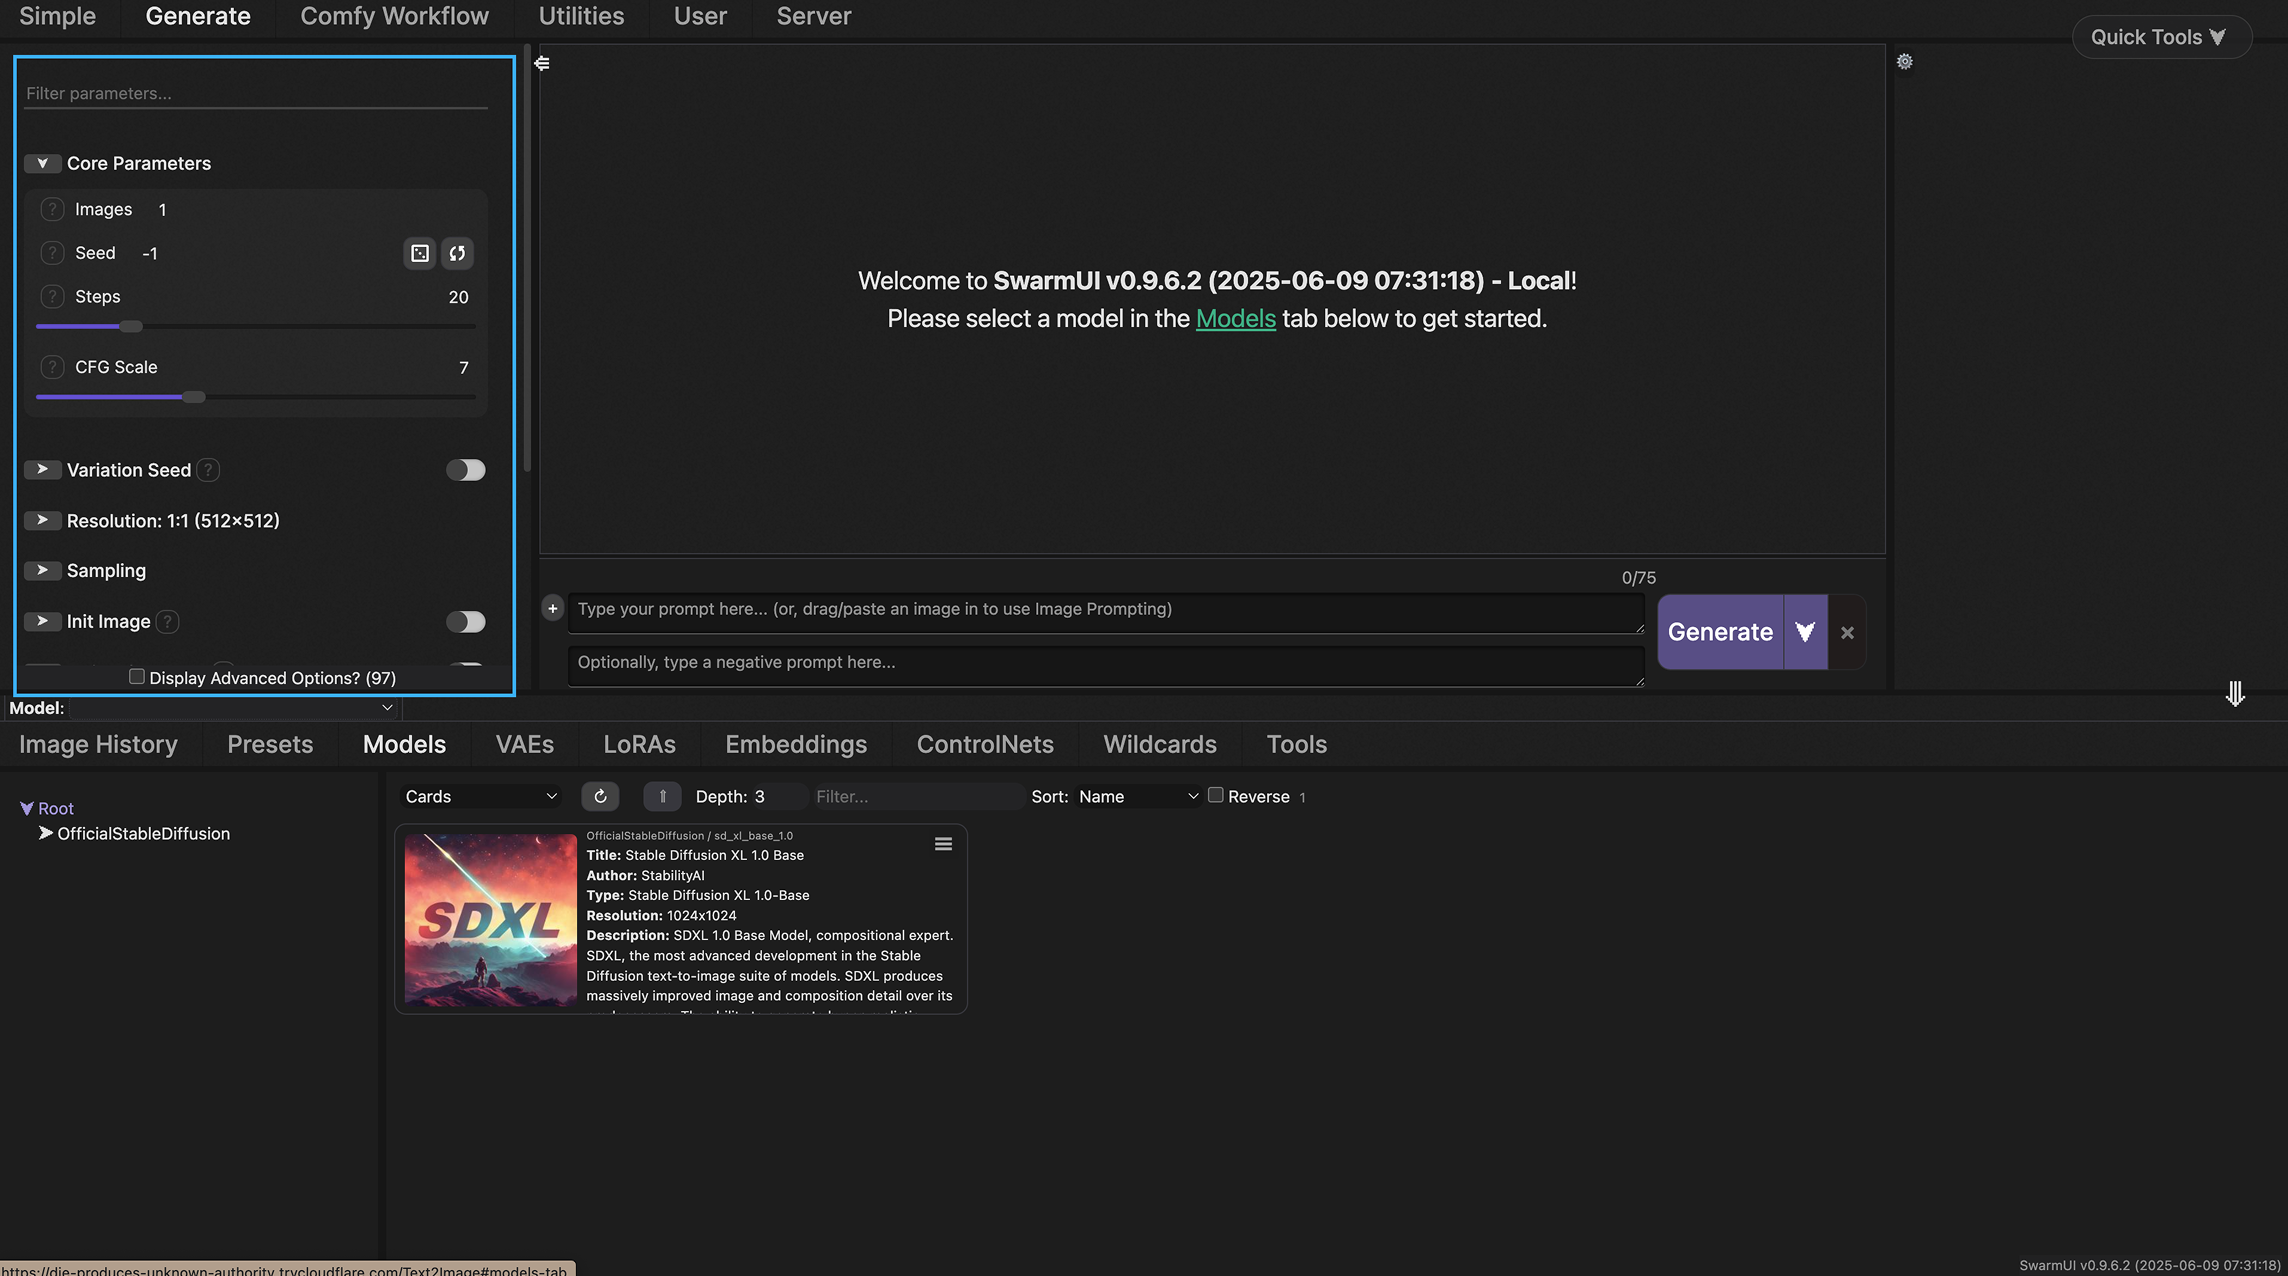
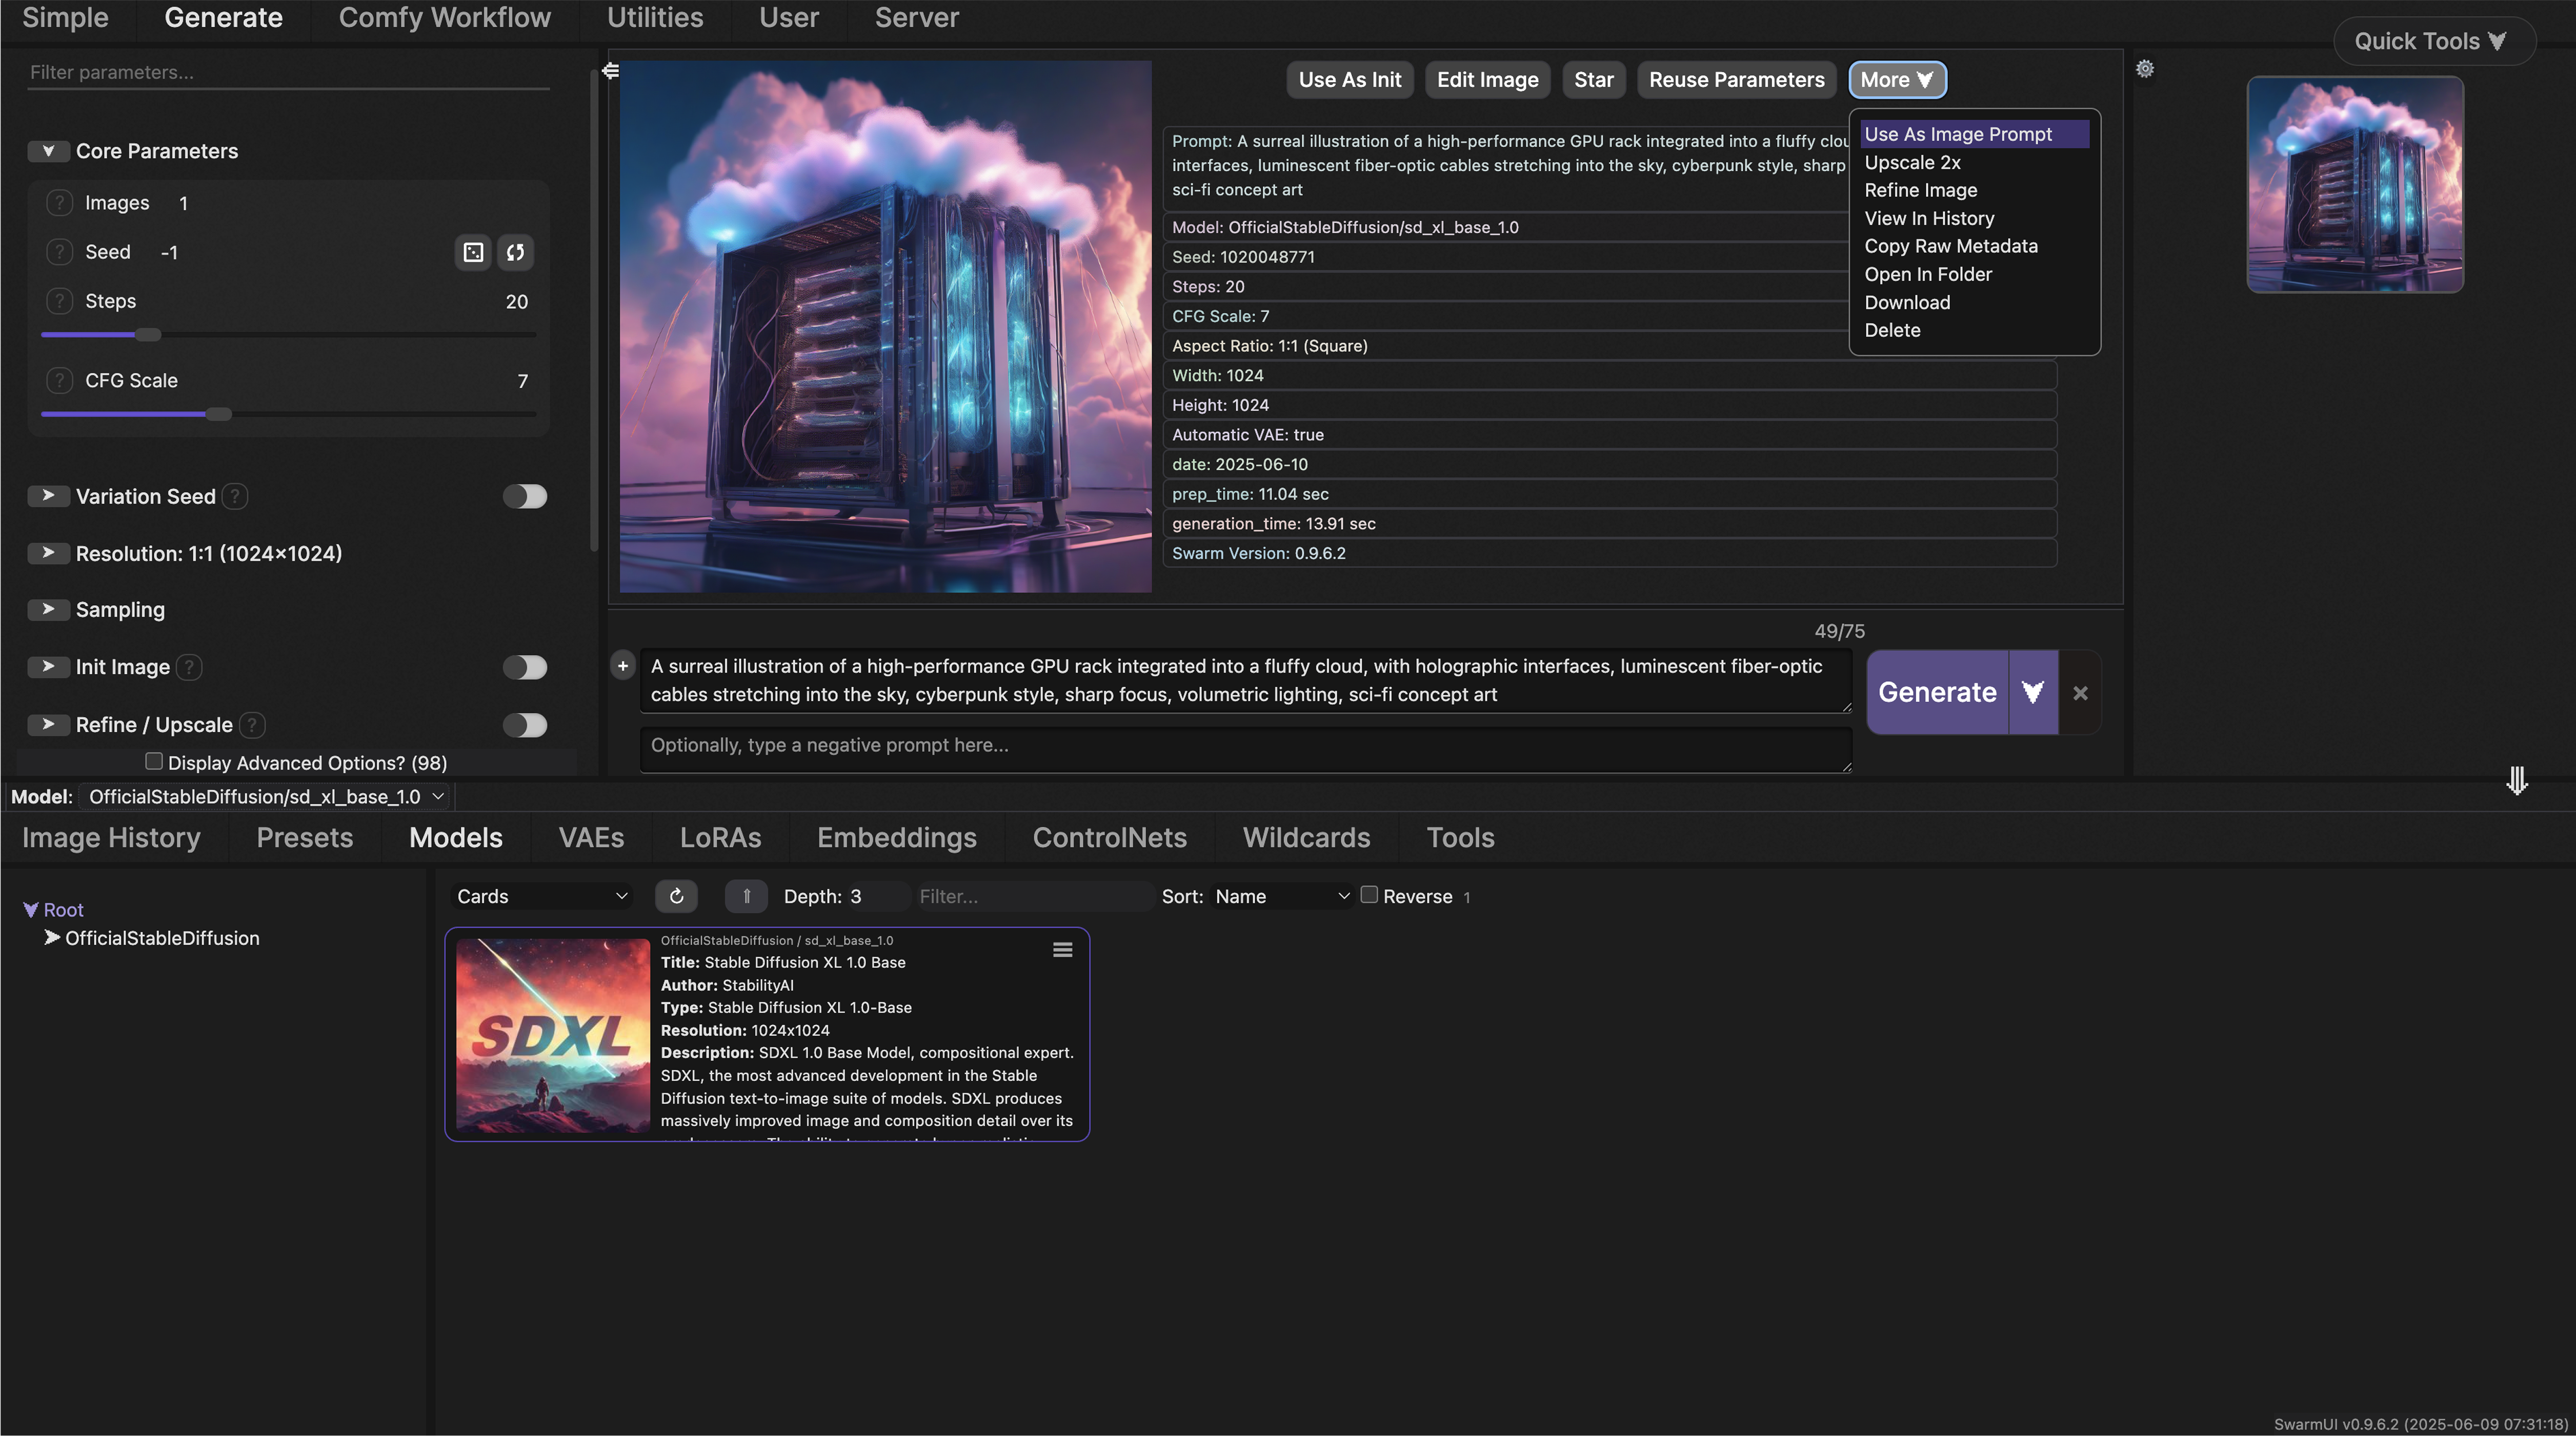
Generate AI Content with ComfyUI: Prompt to Image & Video
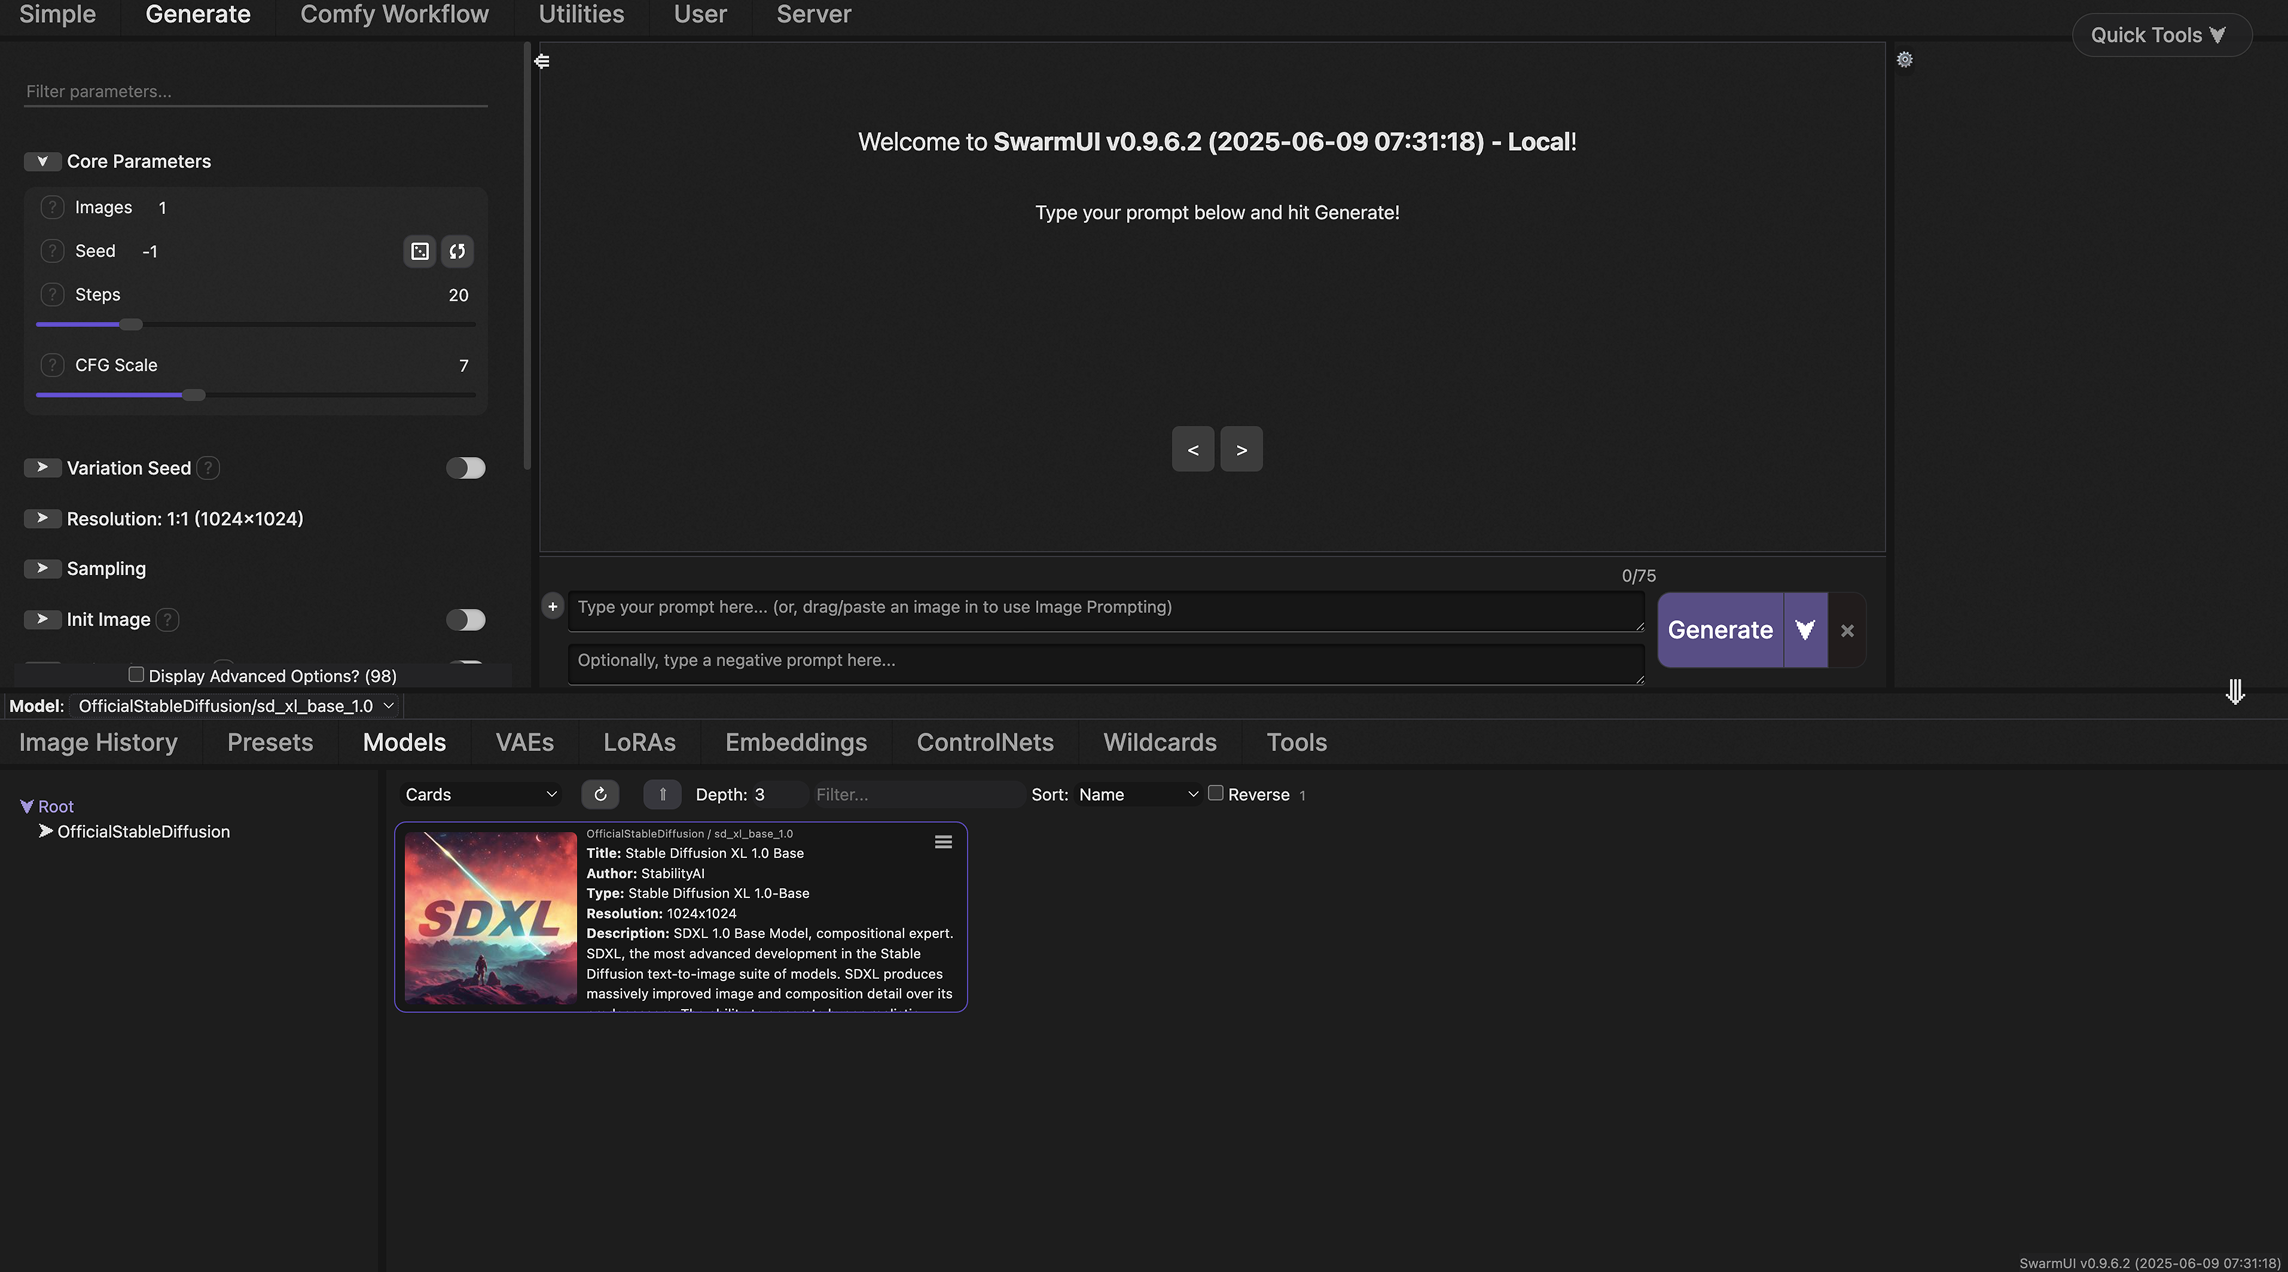
In the work window, select your active model.
Adjust parameters such as output resolution, sampling method, or the image-to-video feature.
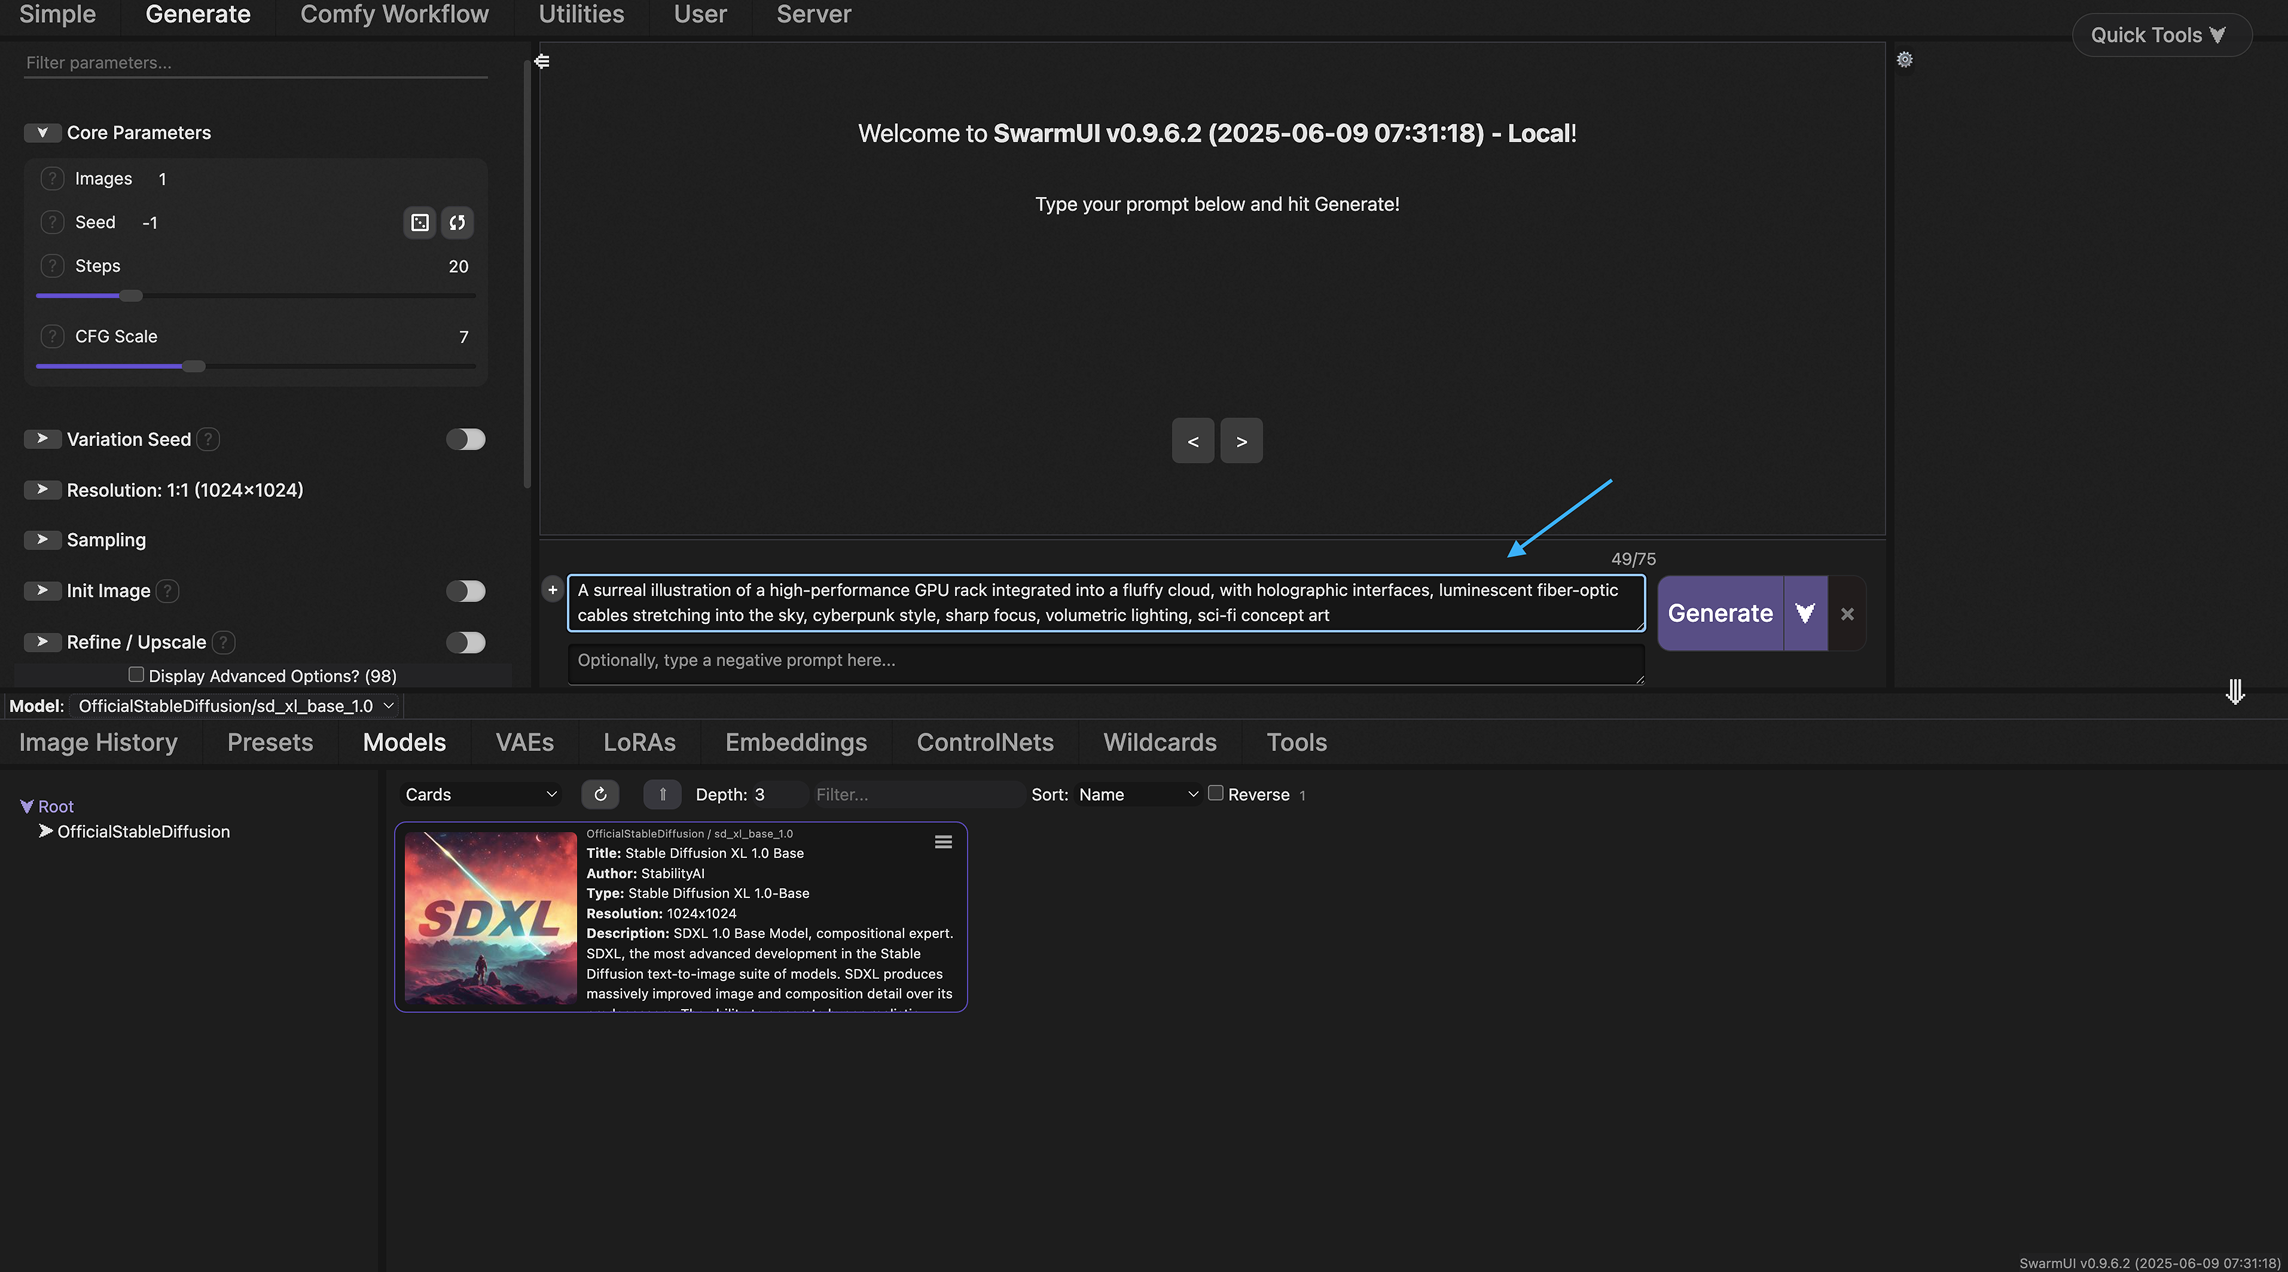
Enter a descriptive prompt.
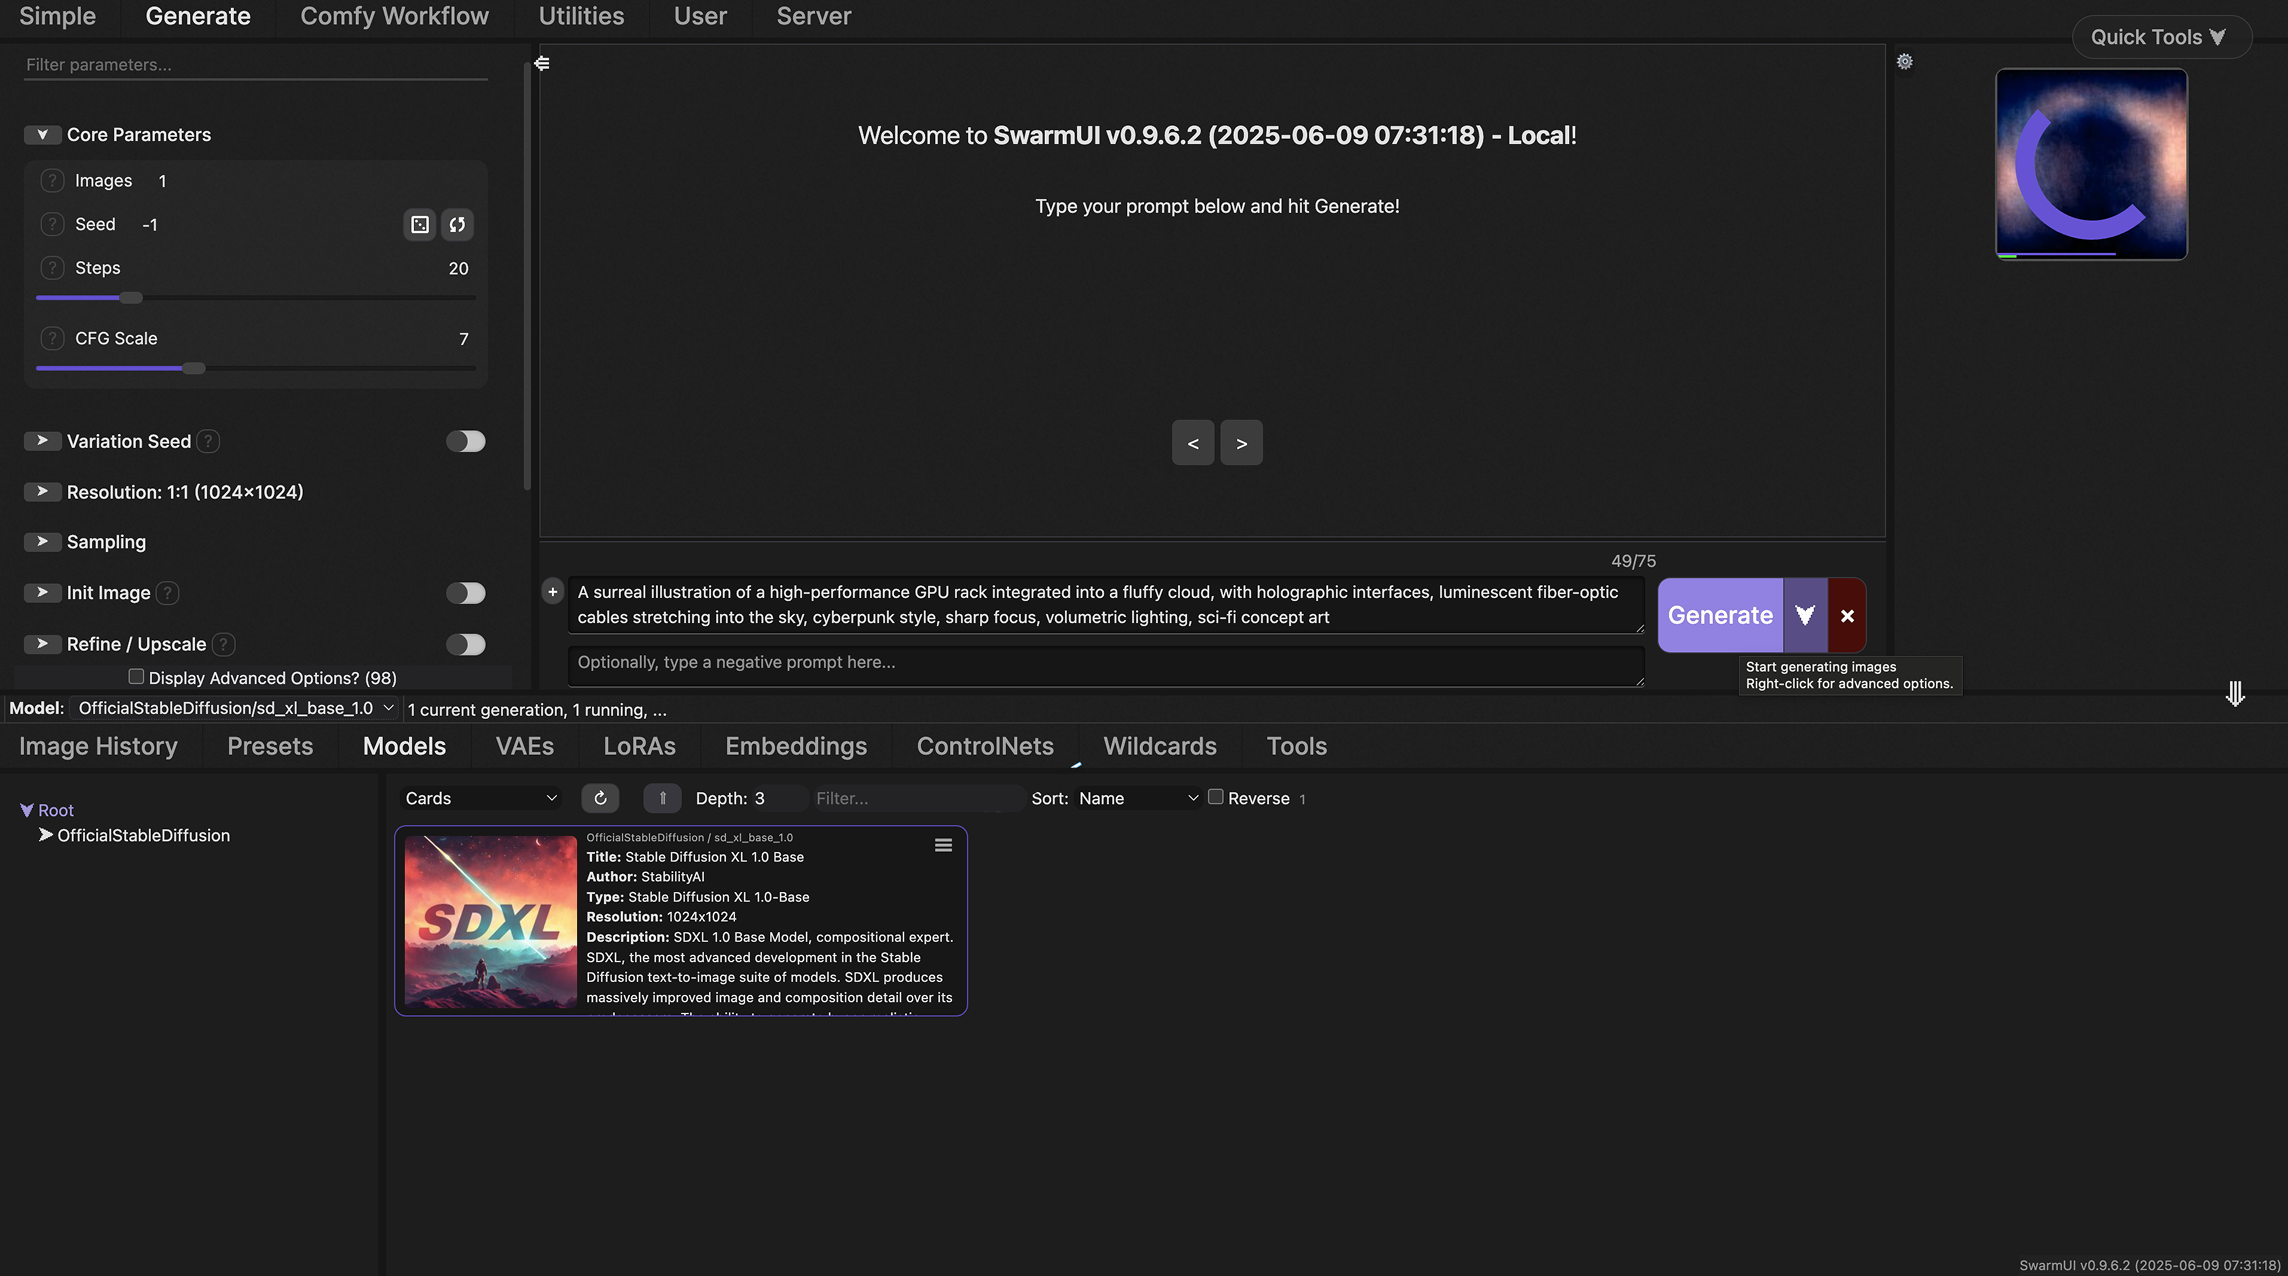
Click Generate and watch the progress indicator.
Step 9
Save Outputs & Export Results
Review your generated images or videos in the gallery. Click Save or Download to export files to your local machine or preferred cloud storage.
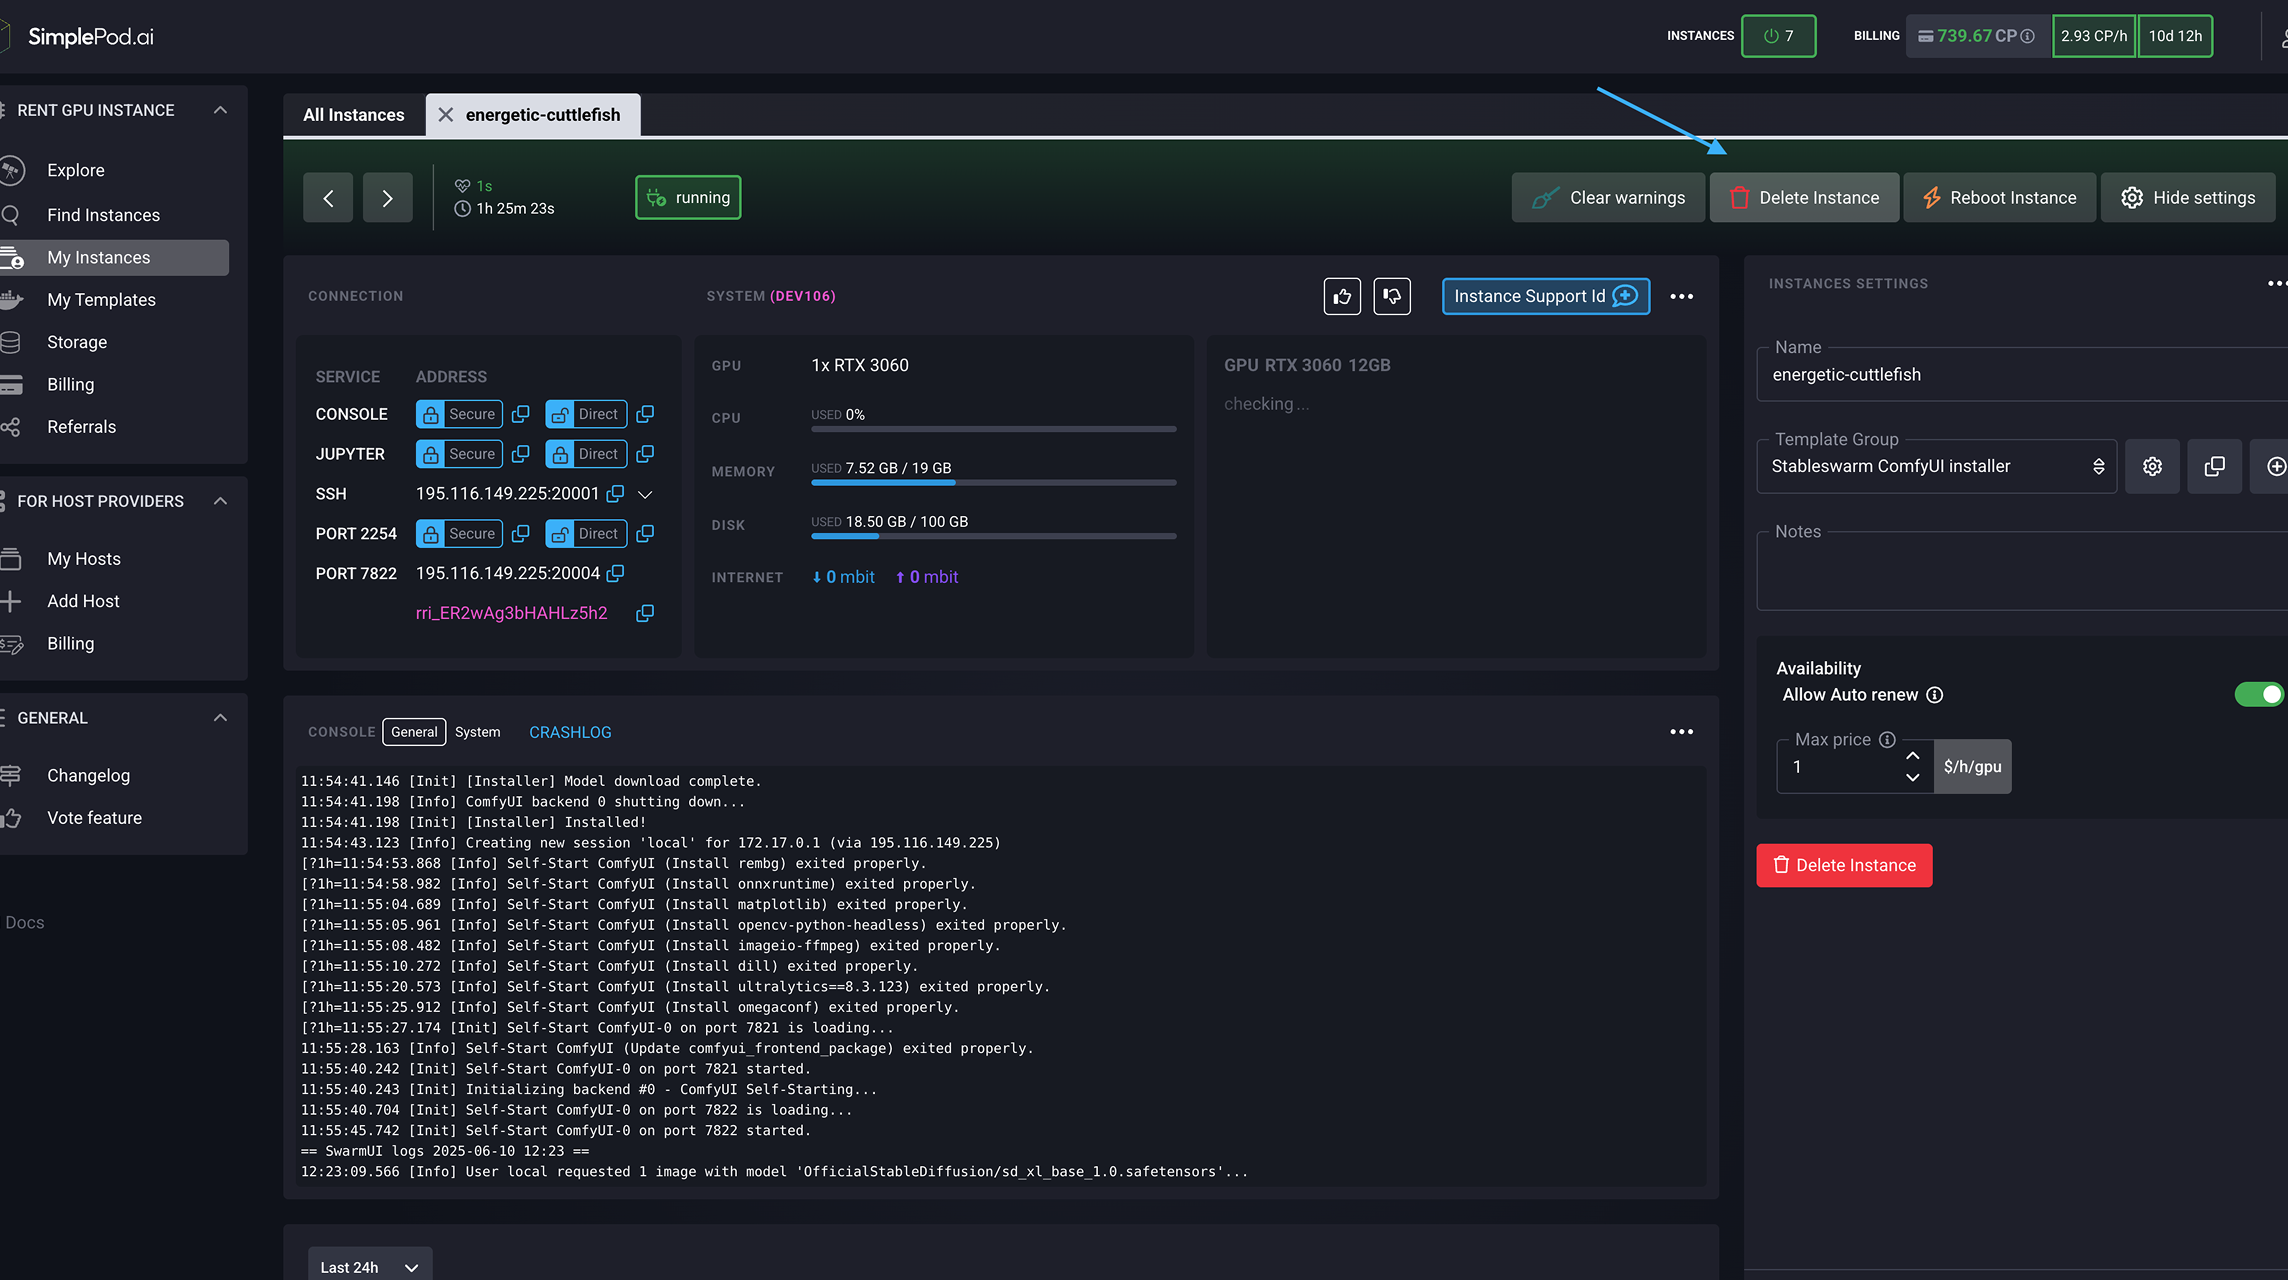
Step 10
Delete Instance & Release Resources
Once your work is complete, return to My Instances, click Delete Instance, and confirm. This frees up all cloud resources and prevents unnecessary charges, ensuring a clean environment for your next session.